January 2021
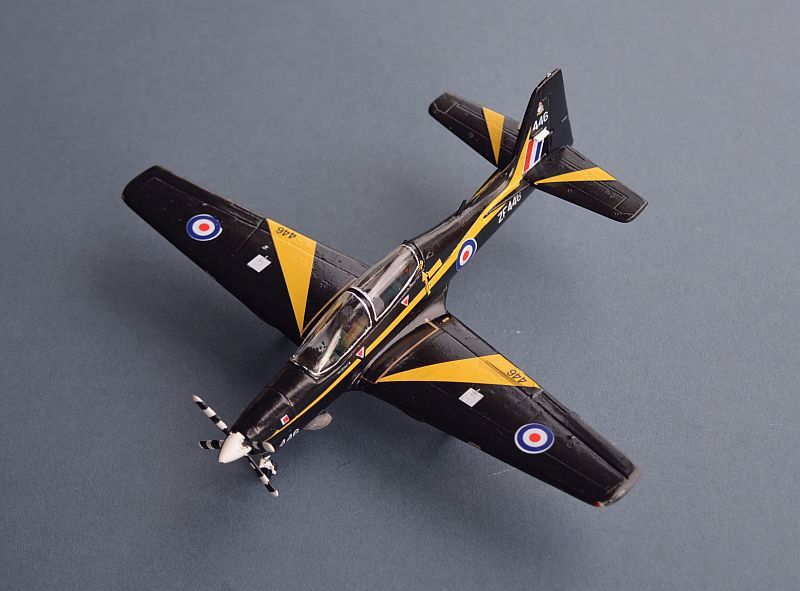
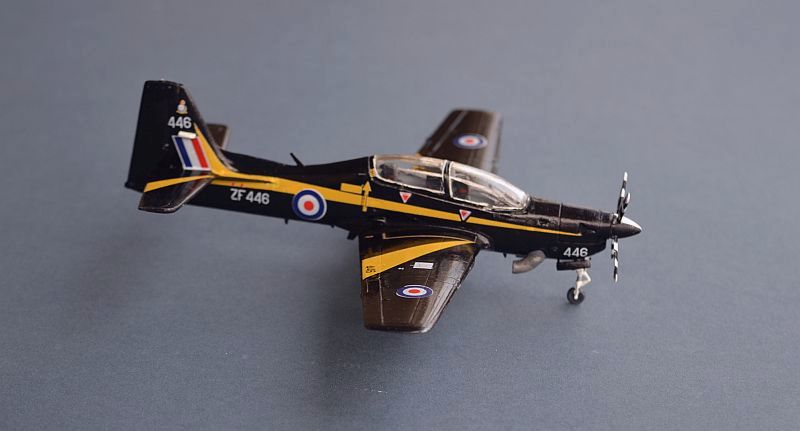
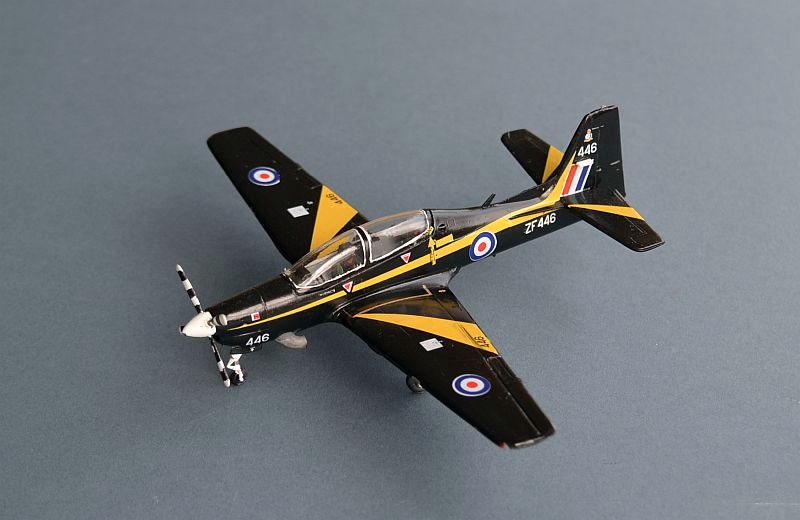
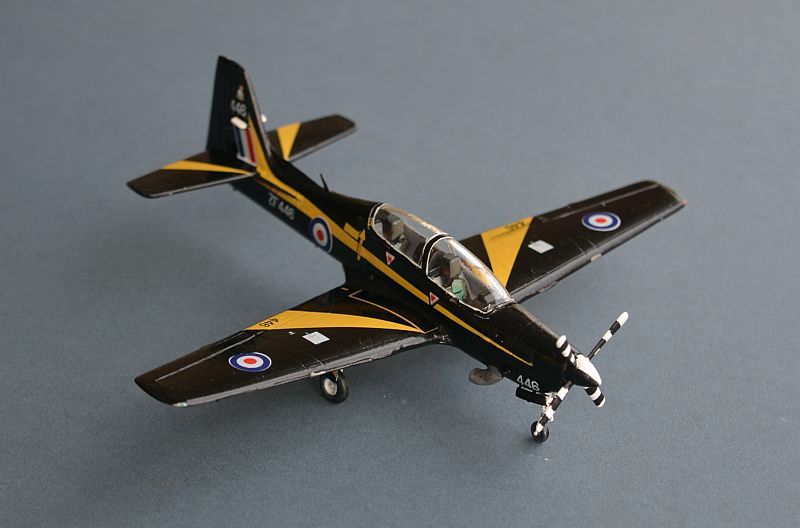
Short Tucano T.1
Grob Tutor T.1
Link to Website Index: ![]()
Short Tucano T.1
No.1 Flying Training School, RAF Linton-
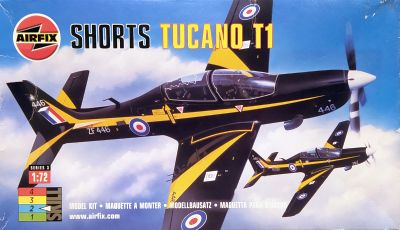
Airfix 1/72 .
Link to Website Index: ![]()
© www.gengriz.co.uk
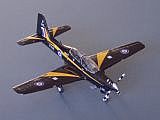
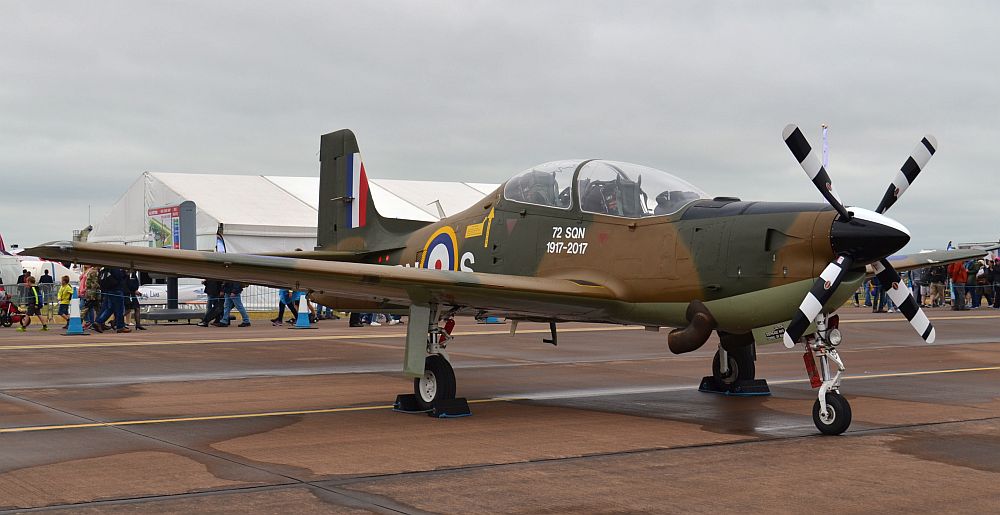
The Short Tucano was a licence-
First deliveries to the RAF took place in 1988, with production ending in 1993 after 130 deliveries. Tucanos remained in UK service for 31 years until October 2019 and were used to train all RAF and RN fast jet pilots and Navigators. Modest export success for Shorts included sales to Kenya and Kuwait, whose aircraft were fitted with 4 underwing hard points for weapons carriage.
Building the Airfix Tucano Kit:
This is one of the best Airfix kits of the early 1990s, with good fit, subtle engraved
panel lines and reasonable accuracy. It lacks a few of the lumps and bumps added
to the Tucano later in its life, but the finished model looks good and is a fast,
easy build. Mine was a 2002 issue, with the early black and yellow scheme and markings
for 1 FTS at RAF Linton-
I only really encountered two build issues; a very small amount of Tippex was used as filler under the fwd and aft wing to fuselage joint and although I had intended to use the two nicely sculpted pilot figures, they are actually too large to fit in the closed cockpit. Indeed they won't even fit into their seats, which is a pity as the cockpit is very bare. Paper seatbelts were added instead.
The propellor has been criticised in some forums, but apart from being very difficult
to paint, I was happy enough with mine. Wing and tailplane trailing edges are also
a little blunt, so benefit from some sanding down. Pre-
My canopy had seen some scratching whilst rattling around in the box, which I thought I had polished out, but some can still be seen. It lacks the very noticeable ejection detonator cord, which is a shame. Nevertheless, the white sealant lines do really need to be painted on (a very delicate task) as they are very prominent on the real thing. Later issues have these included as decals.
The only real let-
That said, they did settle down very nicely into the panel lines with some Klear. If it hadn't been for the unusable roundels I would have been reasonably happy in the end, but the less experienced modeller would probably have experienced a disaster.
So -
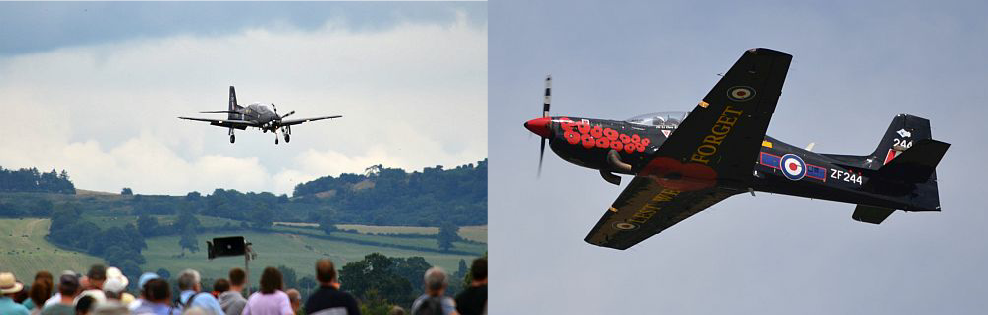
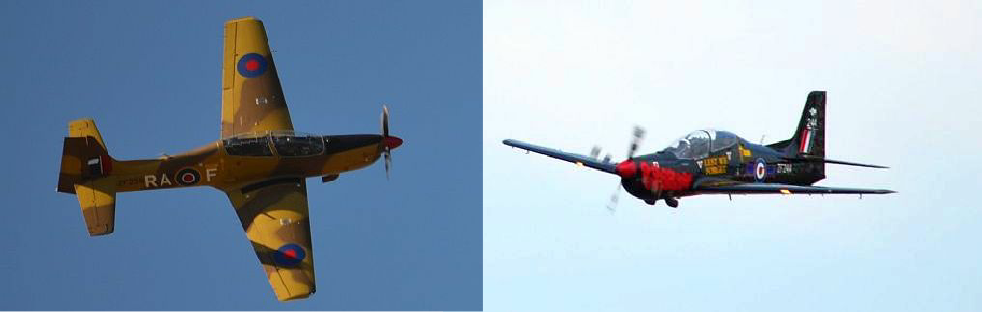
A few images of the real things from various UK Air shows:
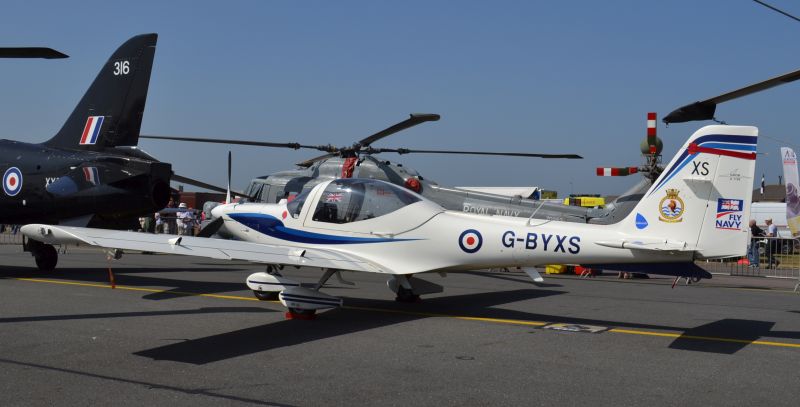
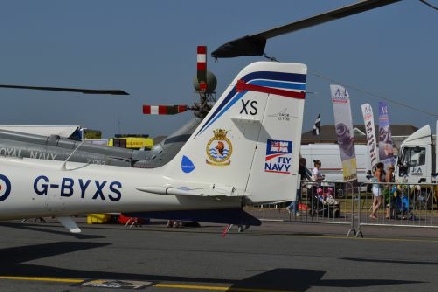
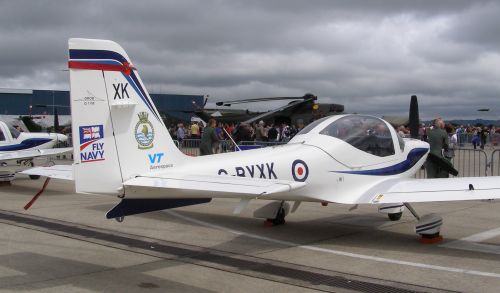
The Grob G115E Tutor T.1 became the UK's basic flying trainer in 1999, initially with University Air Squadrons and Air Experience Flights, but then more widely replacing the Scottish Aviation Bulldog and the DHC Chipmunk for RN, Army and RAF elementary training.
Supplied, operated and maintained under a Private Finance Initiative (PFI) by Babcock as part of the UK Light Aircraft Flying Training contract, Grobs are now (2020) being gradually replaced by turboprop powered Grob Prefect aircraft, but remain in widespread use. The aircraft carry UK military roundels, but also display civilian registrations.
Built in Germany by the now defunct Grob Aircraft, the E variant serves as a military
trainer with the UK, Egypt and Finland. Largely built from composite materials, it
is an agile and reliable aircraft capable of basic aerobatics. UK Military service
has been relatively trouble-
Five Tutor T.1s are operated by 727 Naval Air Sqn at RNAS Yeovilton (originally out of Plymouth Airport) for basic Flight Grading..
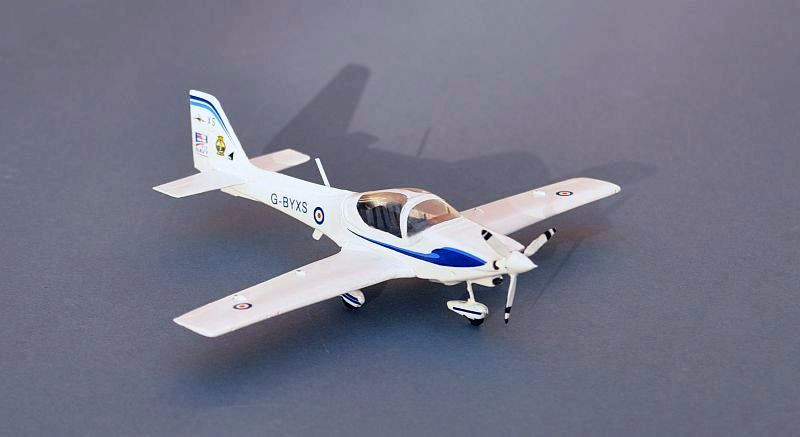
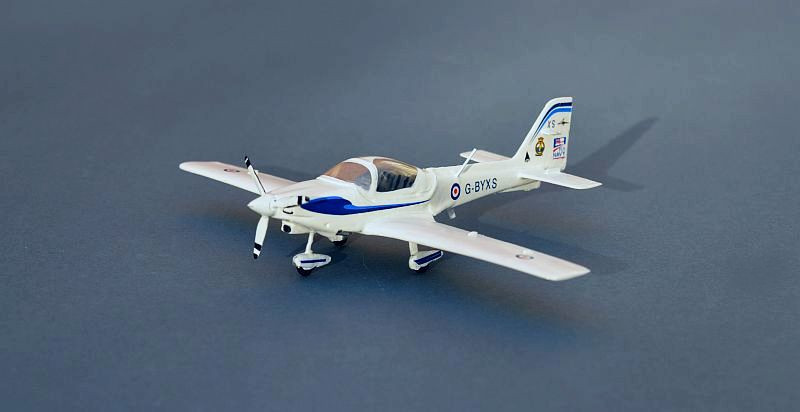
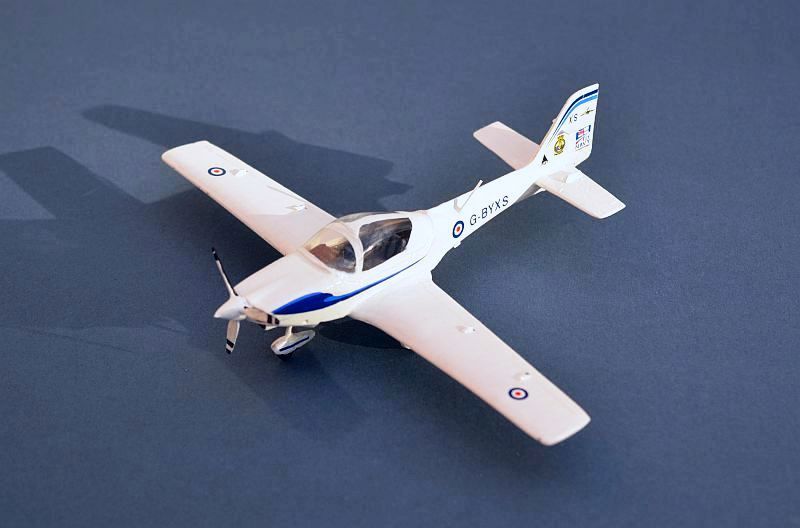
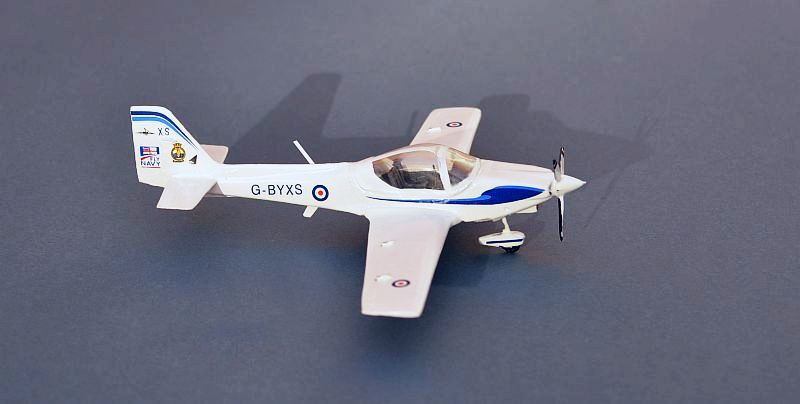
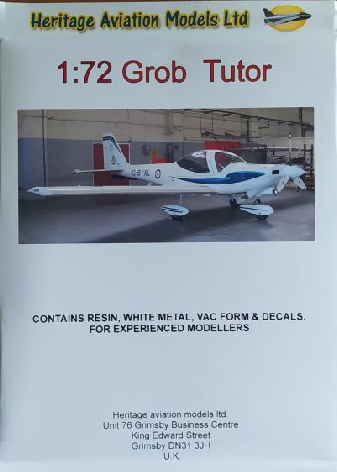
Building the Heritage Tutor Kit:
This is the Heritage Aviation resin kit of the RN/RAF Grob Tutor T.1, which cost
me £16 from Heritage at Telford in 2011. The kit is very straightforward, with a
resin fuselage, wing, to seats and two tailplanes. White metal wheels and a propellor
(actualy 2 propellors, but one is not appropriate for this kit) are accompanied by
two acetate canopies -
The kit fitted together easily using cyanoacrylate glue (thank goodness, my record
with resin and superglue is not good!), with a little filler needed in the wing to
fuselage joints (I simply used Krystal Kleer). The undercarriage parts are a little
crude in shape and sufficiently thin that they are likely to be a weak point on the
finished kit. I enlarged their location holes and drizzled superglue around them
to try and give more strength. The weight of the propellor makes sure that the kit
is not a tail-
Quite a few scratch details are needed, but none are complex. Heritage mention using wire for the joysticks, but wing and tail flap/aileron actuators are also needed, as are a number of antennae (check references as the aircraft differ) and the engine exhaust pipes. I painted on the seat belts and a number of cabin details.
Decals are nice, covering a wide range of aircraft and operating units. For the RN aircraft, the Fly Navy markings in my real life pictures were not provided. These are one of the few obvious indications that it is not an RAF aircraft, so I robbed and trimmed some suitable ModelArt decals to use.
A simple kit, but one that built easily and I'm very satisfied with the end result!
A few images of the real things from the Yeovilton air show: