December 2020
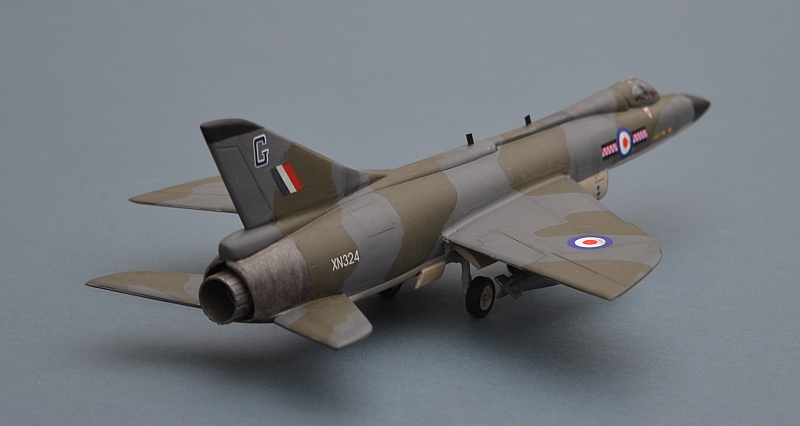
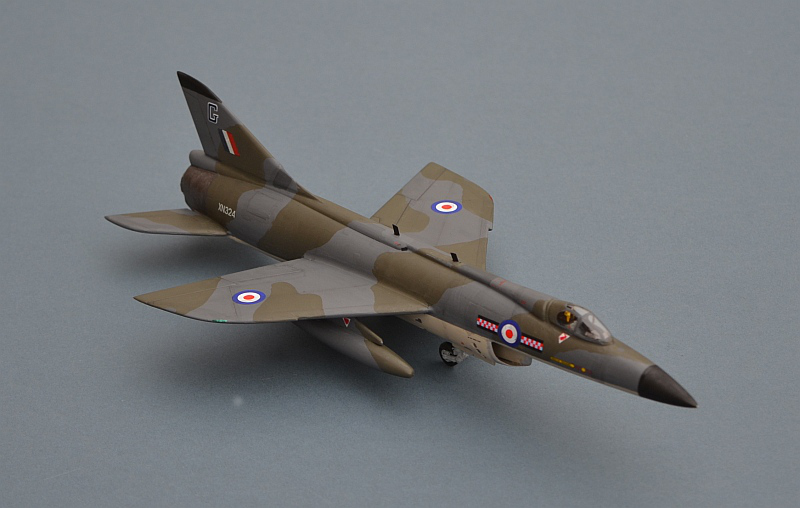
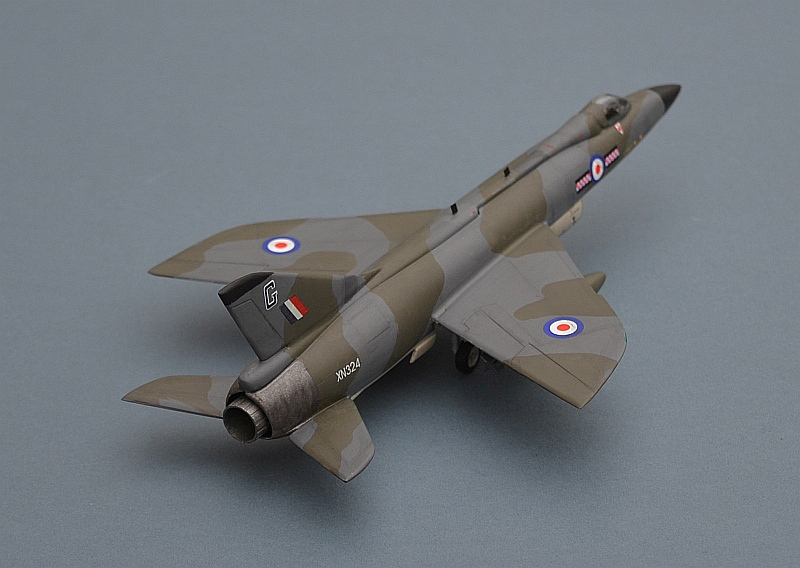
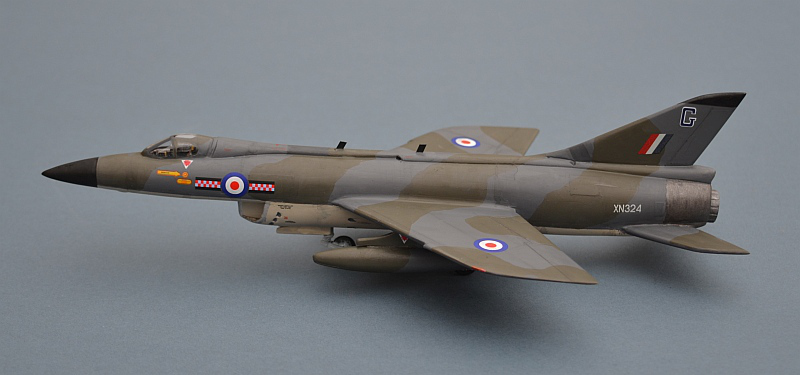
Hawker P.1121 “Hurricane 2”
Link to Website Index: ![]()
Hawker P.1121 “Hurricane 2”
603 (City of Edinburgh) Squadron, Royal Auxiliary Air Force
RAF Turnhouse (Edinburgh Airport) 1969.
Maintrack Project X Vacform 1/72 with various scratch / spare items
Link to Website Index: ![]()
© www.gengriz.co.uk
Have a look at many more What-
Whenever anyone talks about cancelled British Aircraft Projects, attention immediately turns to the BAC TSR.2, whose cancellation in 1965 after its first flights left much of the UK military aviation industry adrift and directionless. Whatever you feel about the TSR.2, the consequences of its demise were significant.
However, it was not the only advanced British project that fell by the wayside. Government
funded BAC's main competitor, the Hawker Siddeley Group had a similar flagship project,
the privately developed Hawker P.1121 (anecdotally named Hurricane or Cyclone), loosely
based on the same Operational Requirement (OR.339) for a high speed strike aircraft
and powered by a massive single DeHavilland Gyron engine of 25,000lbs reheated thrust.
At the point of its cancellation by Hawker in 1958 (unlike TSR.2, the Government
had not ordered the P.1121 so did not cancel it), a full scale mock-


.In reality, lead designer Sir Sydney Camm's P.1121 had never been a credible contender for OR.339 and had originally been designed for a different requirement, OR.329 whch called for a long range interceptor. Although it was an astonishingly elegant design and expected to exceed mach 2.5, the RAF showed little interest, complaining that Hawker had simply produced a vastly updated version of the Hunter, a general purpose fighter aircraft with an unclear role in modern specialised air warfare. This was largely true; Hawker's focus had been on the airframe and they had not integrated any specific weapons systems, simply adding wing pylons to hang "something" under. Plus, its climb rate to height was mediocre. In any event, OR.329 was cancelled in 1958 following the infamous 1957 Sandys'Defence Review and its confident assertion of the end of manned fighters in the missile era. The Gyron engine was a parallel development for OR.329 and was cancelled at the same time.
Sensing an existential crisis, Hawker then grasped at every opportunity they could find, but specifically the long range supersonic strike role of OR.339. Thus, the P.1121 quickly became a nuclear bomber (with a weapon hung under a wing). The Rolls Royce Olympus was quickly identified as a potential replacement for the Gyron, albeit less powerful in its current state of development. But, with no internal bomb bay (contemporary nuclear weapons could not be carried externally at supersonic speeds), designed to operate at medium height and based around an experimental engine with an unclear future, it lost the competition to a combined Vickers/English Electric design, the much better known TSR.2.
In retrospect, the P.1121 was remarkably similar in its multiple roles to the aircraft
that the RAF eventually received, the F-
The Hawker design team quickly moved on to the next imminent politically driven disaster, the unhappy P.1154, finally hitting the mark with the far more modest P.1127 Kestrel and the amazing Hawker Harrier.
As the fateful year of lockdown draws to an end, with a very real prospect of more in 2021, I felt it might be time to move away from "comfort builds" of familiar kits on to try something a little more difficult. After all, I have the time.....
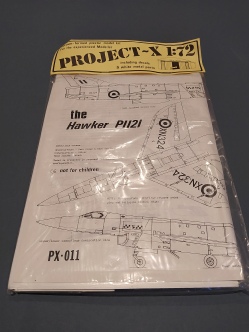
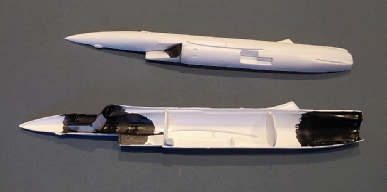
So here we go, it's a vacform -
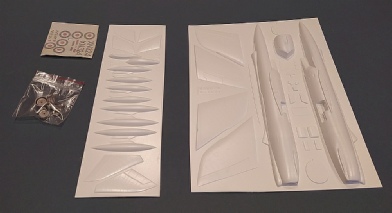
This is a Maintrack Models "Project X" issue of this kit from the 1990s -
Best of all, once the parts are neatly trimmed from the sheets, they actually fit together, are symmetrical and reasonably well thought out. I still wouldn't describe them as easy to build, but this is about as good as vacform gets.
My approach to vacforms is fairly conventional -
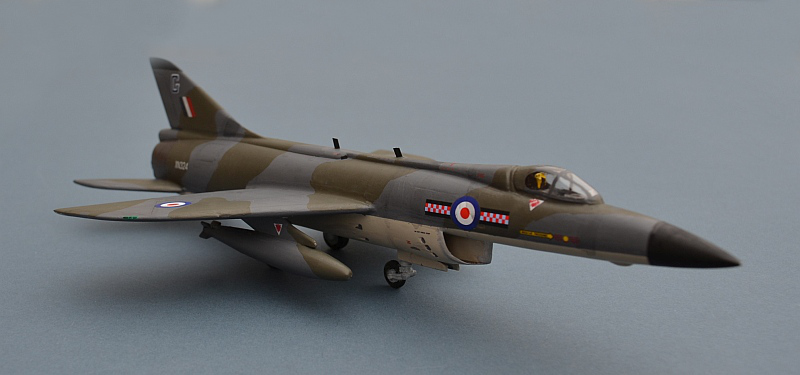
Unlike with my P.1154 build, this time I did fit the bulkheads for rigidity (and remembered to build a small containment in the nose for some lead shot). The cockpit is very simple, but ripe for scratch detail additions. The white metal ejector seat finishes the cockpit nicely, with some simple fuse wire ejection handles added to the top of the seat.
I also added some blocks of thick square sprue strengtheners to the inside of the
fuselage where the wheels would attach. This didn't work quite so well. Although
I managed to drill the holes as planned, one of the rear strengtheners sprung off
internally as I inserted the undercarriage leg (cue some difficult rework), then
I found that the re-
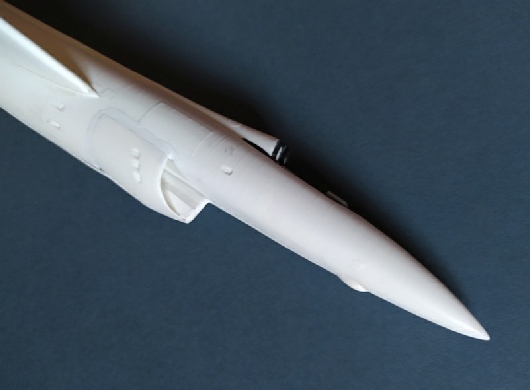
Perhaps the most difficult part of this kit is the distinctive air intake. It looks good on the sheet, but fitting it together and then smoothing into the rest of the fuselage is difficult. Sensibly, this is now supplied as one of the resin parts on the more recent kit issues.
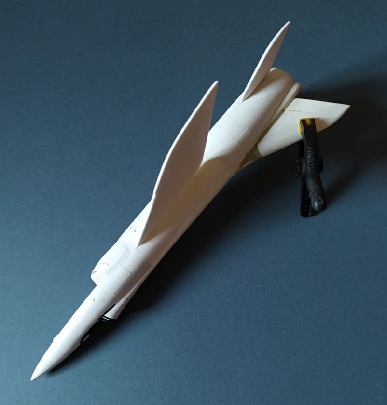
For the tailplanes and wings, I went for a simple butt joint. Attaching spars or wire strengtheners always sounds like a good idea, but in my experience it is exceptionally difficult to line things up and get the wings level.
The plastic is actually quite thick and strong, so sanding the wings until I was happy with their fit, then fixing directly onto the fuselage with liquid glue worked well for me.
I then added some Milliput putty to fair things in and tidy up afterward.
The selection of white metal parts supplied with the Maintrack issue includes a tailpipe.
Unfortunately this is a very simple and crude bucket shape, so I abandoned it for
a part from my spares box, an ex-
The canopy gave me some grief and did not fit well. This is partly because the cockpit coaming has a dip that did not seem to match the clear parts and the rear coaming seems to be a little too large in diameter (which could, of course, simply be my trimming and joining of the fuselage halves). Some Micro Klear filled the gaps, but it is a little disappointing.
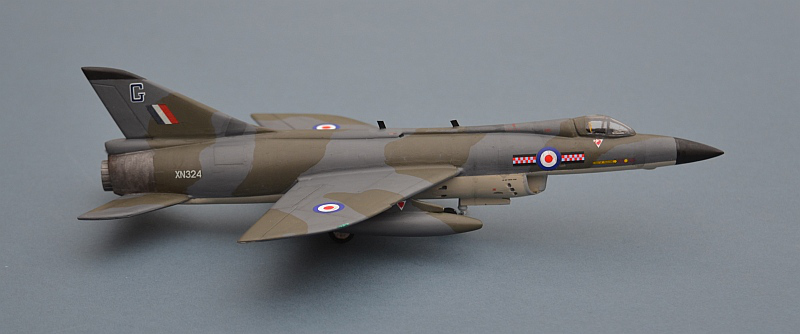
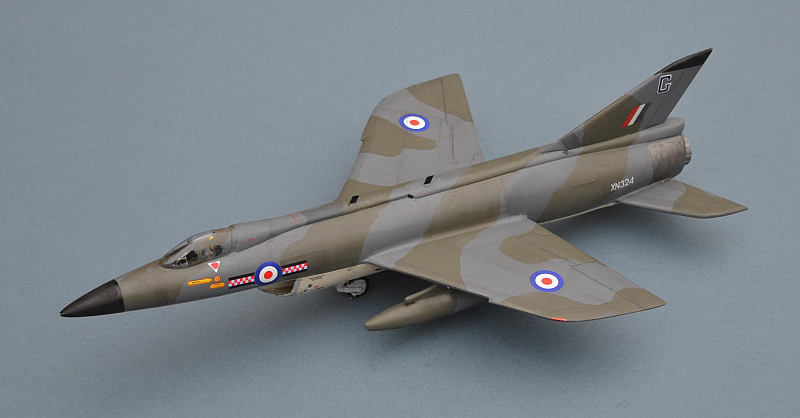
Like the RAF, I had real difficulties deciding the aircraft's role and thus its armament.
I do like my "what-
There is no internal bomb bay, by design. Maintrack provide a reasonable vacform
representation of a partly recessed Red Beard nuclear weapon, but would have you
attach it to the fuselage underside in an area that would not have been structurally
capable of holding it. Ground clearance might also have been a big safety issue
in that position; Red Beard was notoriously fragile and could explode (non-
Various on-
I guess these would have helped, but as an interceptor it is really not clear how the massive P.1121 would have been any more effective than a Lightning!
Paint is Humbrol enamel (163/164/166), thinned and hand brushed multiple coats as
always, Klear sealing coat, pencil detailing, oily wash in strategic areas, then
Windsor & Newton semi-
Maintrack supply some basic but well printed decals for an aircraft of 54 Sqn, with
some credible serials. As supplied these are the type that you apply dry (like stickers),
then remove the paper backing with water. These work well in most respects but it
is not possible to re-
All in all, I really enjoyed this build and the end result is interesting, almost unique and suitably personalised. There were a few frustrations along the way and it took much longer than one of my normal builds (even during lockdown).
Nevertheless, I am really pleased with the results and can add another important bit of British Aviation history to my "Could Have Been" collection. The old Maintrack vacforms really are some of the best and if you've never tried one, they or their successors are a good place to start.