June 2016
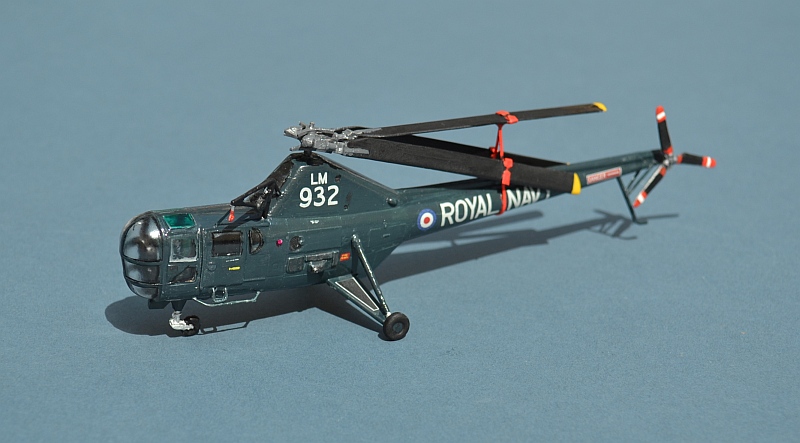
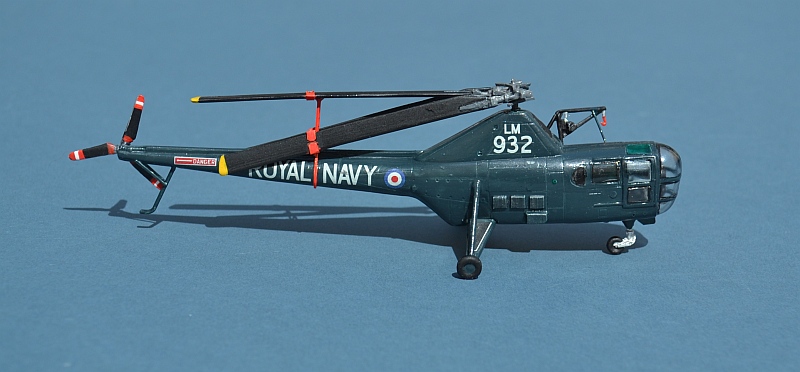
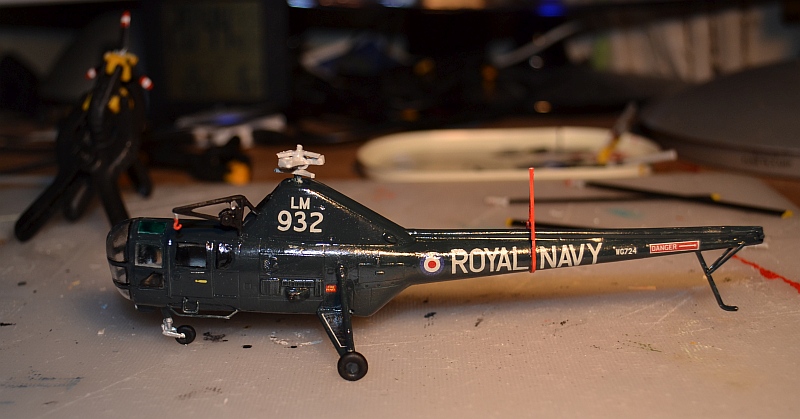
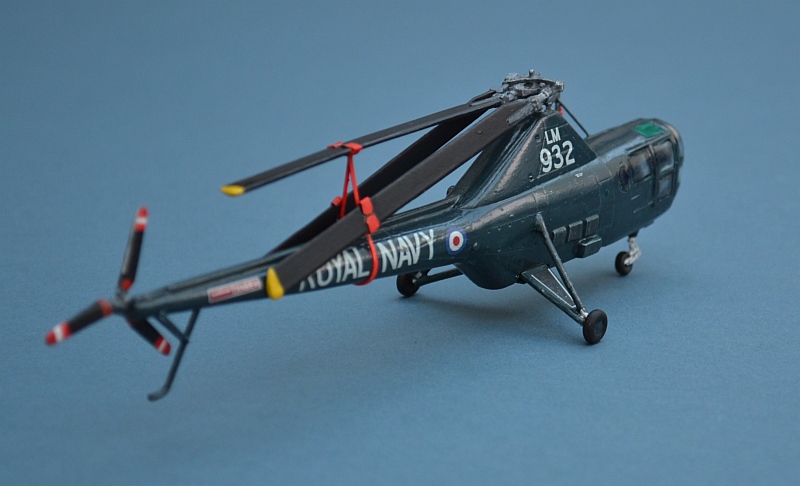
Westland Dragonfly HR.5
Link to Website Index: ![]()
RNAS Lossiemouth SAR Flight (705 Sqn), 1961
Mach 2 1/72 with Britavia decals
Based on the Sikorsky S-
For British service, Westlands substituted the 450 HP P&W Wasp engine fitted in Sikorsky’s machines with a more powerful British 500 HP Alvis Leonides engine that gave an improved top speed of 103 mph. In total, 133 Dragonflies were built by Westlands , including 51 civilian machines, with the first military aircraft entering RN service in 1950.
The Dragonfly pioneered naval SAR activities and quickly showed that it could replace an entire escort vessel as plane guard for the RN’s aircraft carriers. Ashore, the RN’s air stations were all provided with SAR Flights, some of which continued to be equipped with Dragonflies until the early 1960s.
Given that it was such an important link in the development of the helicopter, the
Sikorsky S-
For now at least, your best bet is Mach 2, a French short-
I purchased mine in Paris just before Easter at the wonderful and superbly stocked Euromaquette shop near to the Gare de Lyon (wholly recommended as one of the friendliest model shops I have visited in years, even if you don’t speak French), where it cost me the equivalent of around £12.
Mach 2 kits are definitely “old-
.
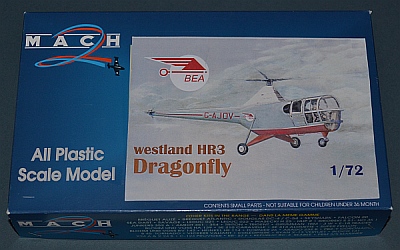
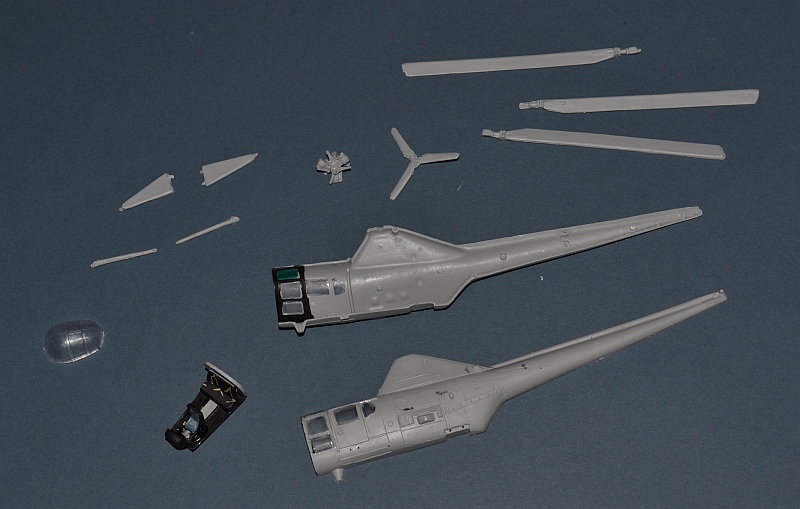
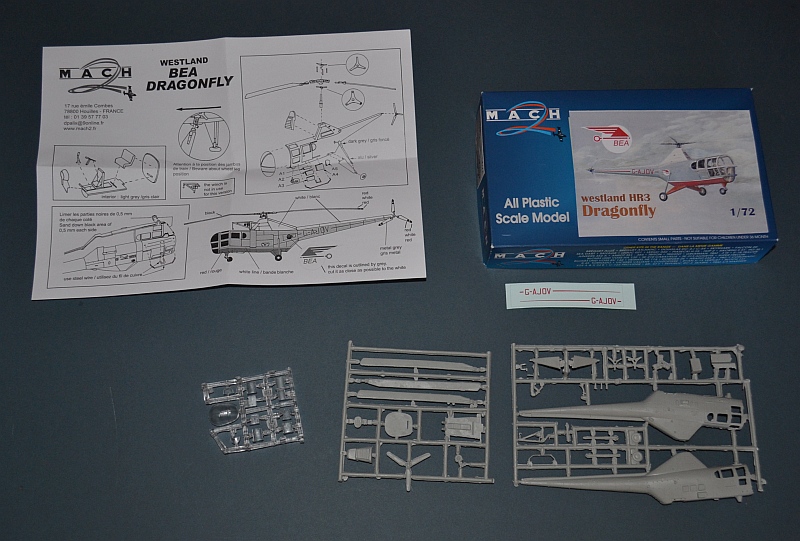
The kit comes in a robust small box, containing two grey sprues, one clear sprue (whose degree of “clearness” is somewhat relative), an A4 instruction sheet and two small (nicely printed) decal sheets. My one is the current BEA civil issue, representing an aircraft that sits in the RAF Cosford Museum, but, no surprise I’m sure, I intend to build it as an RN version instead.
Construction starts conventionally, with assembly of the rather blob-
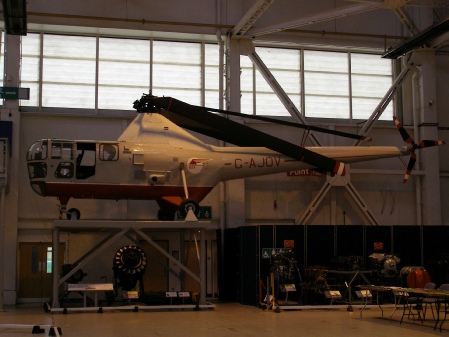
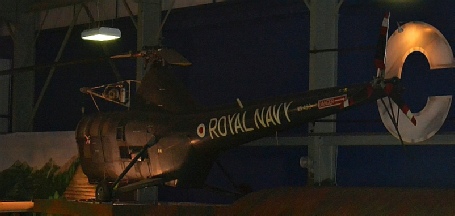
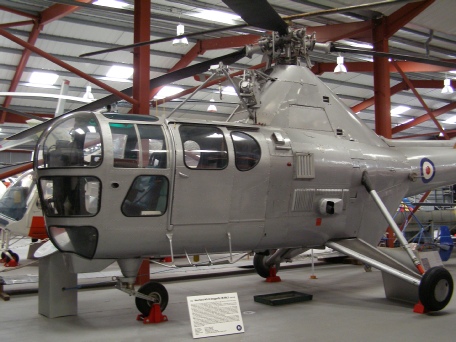
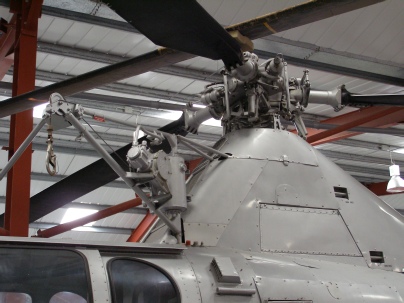
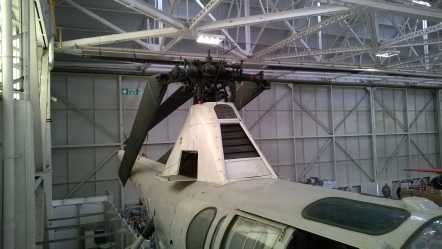
The real things at Yeovilton, Cosford and Weston Super Mare:
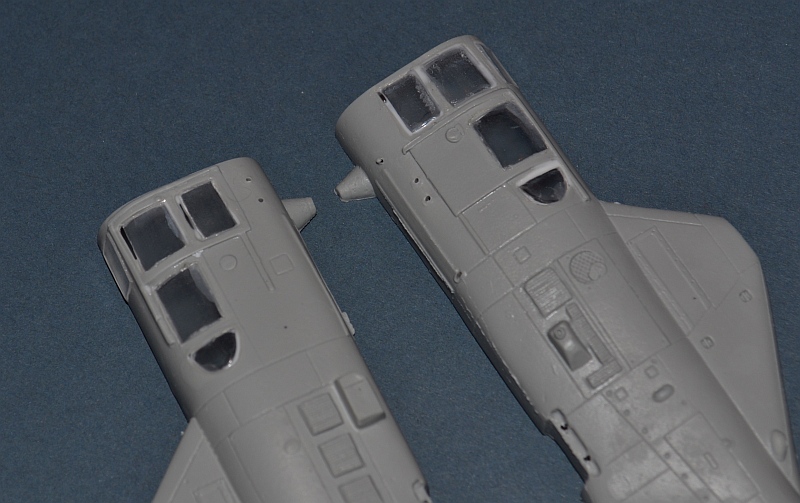
Having been caught with short run kits before, I was keen to make sure that the less than symmetrical cockpit parts actually fitted in the fuselage, so started cleaning up the port and starboard parts for a dry fit. The result was pleasing – the two halves fit together well, and the cockpit fits inside quite comfortably. Filler will be needed when joining the two halves, but not in large amounts. I also took the opportunity to sand the cockpit front flat before the internal parts were added, as they protrude by a few millimetres, which would make doing this at a later stage very difficult.
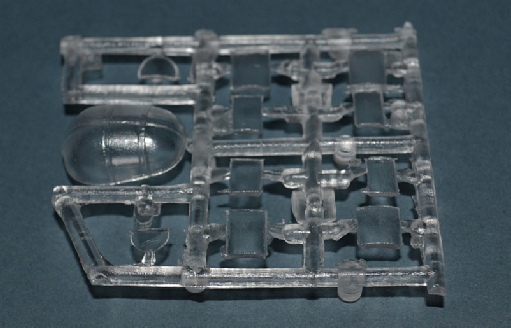
This kit’s Achillie’s Heel is its transparencies, which are neither transparent nor do they actually fit the holes provided. This opaqueness is a fairly common criticism of Mach 2 – I’m not sure whether it is caused by the grade of plastic they use, insufficient polishing of the moulds, or is simply a result of the available moulding techniques, but it does turn an otherwise slightly awkward kit into a difficult one. Unfortunately, the glazed nose of the Dragonfly is a very specific characteristic and after a whole evening of fettling the holes and clear parts, I arrived at a sort of OK solution. Some Krystal Klear will be needed later to fill some of the gaps but this should be OK. More difficult will be polishing out the rough surfaces without dislodging the parts as I do it.
After a quick coat of interior paint, the cabin floor was glued into the starboard fuselage and the two halves joined. A fair amount of Tippex correction fluid was then drizzled into the joints as a filler and left to set whilst I cleaned up some of the smaller components. The main rotor assembly looks a little disappointing on the sprue, but cleans up to a reasonable level, as does the tail rotor. The main undercarriage sponsons were OK, but the supporting arms proved difficult to clean due to their many sprue attachment points.
After much polishing with toothpaste (normally very effective) the end result was only marginally better than I started with, which perhaps confirms that it is the grade of plastic as much as the lack of smoothness.
Replacing the side windows with acetate may have been a better idea and since they are essentially flat, should not have been too difficult, although this would still have left the nose glazing rather opaque.
The kit also comes with a number of small thin parts for items such as cabin steps. These were quite a challenge to clean up, but were successful in the end.
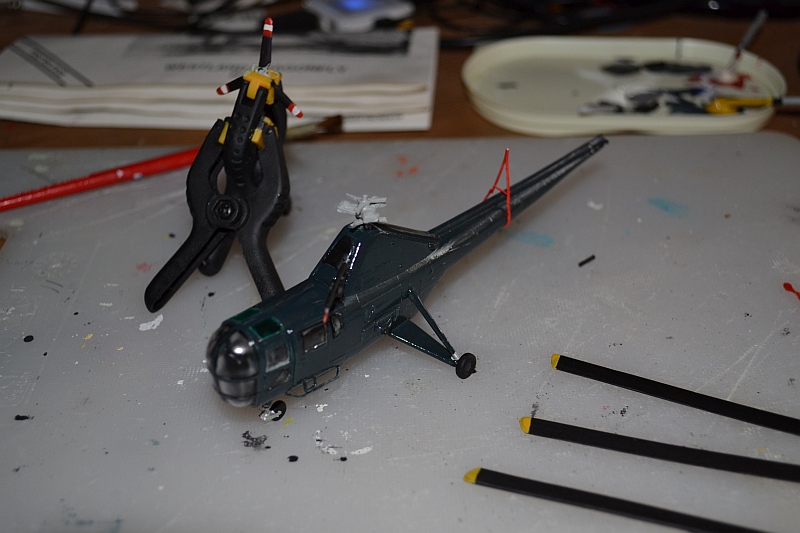
A quick first coat of Xtracolour RAF Blue-
For decals, I have used one of the two RN options supplied with the old Britavia vacform model. As an aside, this is a really lovely moulding, but one that I have never had the nerve to build, not only because it is a vacform, but mainly because it is moulded in acetate, and thus almost impossible to glue or fill effectively. Britavia claim this option to be a 705 Sqn HR.3 aircraft from Lossiemouth in 1961, but some quick research (this aircraft is preserved at the North East Aircraft Museum) suggests that it would actually have been converted to an HR.5 by this time.
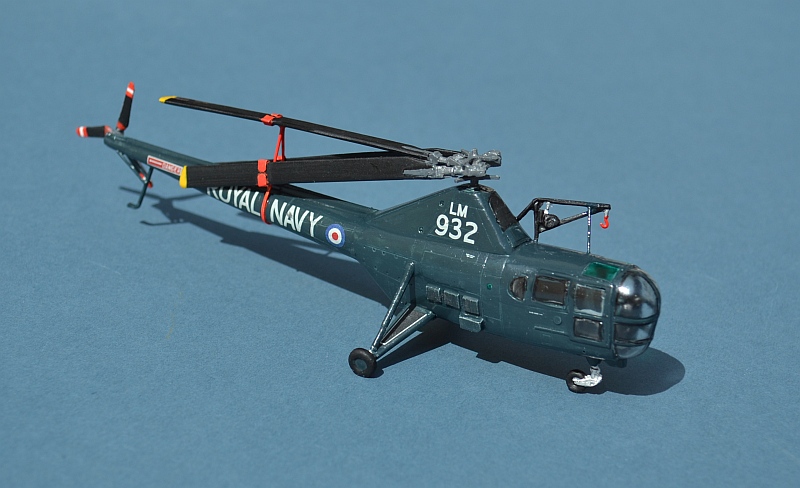
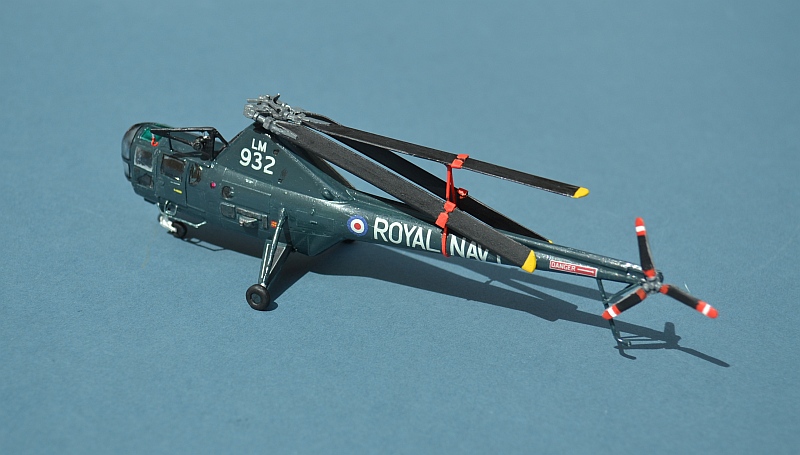
My preference these days is to build helicopter models with blades folded; spread
blades are very fragile and seldom bend/droop correctly and therefore never look
quite realistic to me. The extra effort required to fold is not normally that much,
and I find it gives a real sense of “I built it” satisfaction when complete. Like
many helos, Dragonfly blades sit in a frame on the middle of the tail when folded,
so I constructed this from plastic strip. From a scan of the internet, I did find
two different types in use, but fortunately the simpler two-
To finish off I applied an overall coat of Micro Satin Cote, with some details picked
out in matt and a little dry brushed silver. Transparent parts received an outline
drawn with a black India Ink pen to represent the rubber frames, then yet another
coat of Klear, leaving them reasonably see-
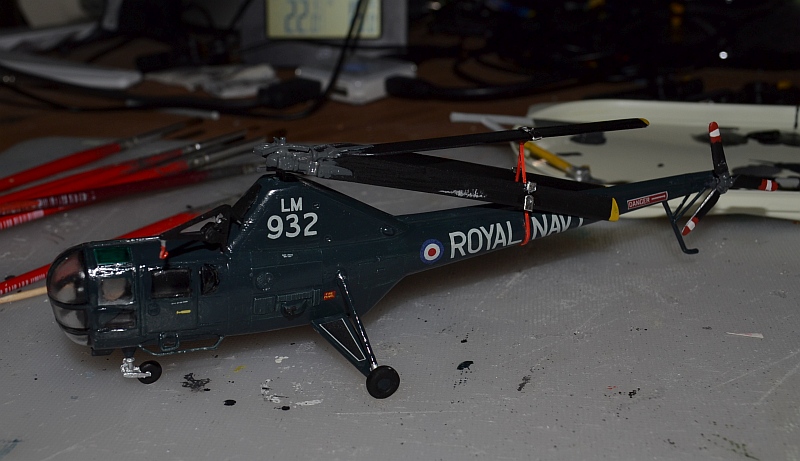
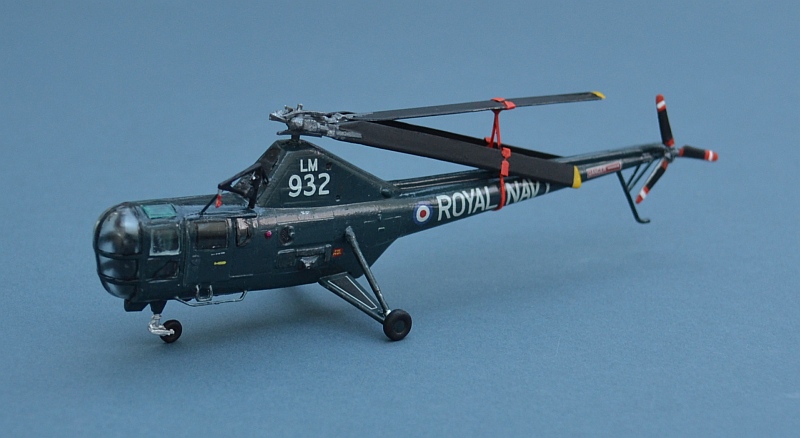
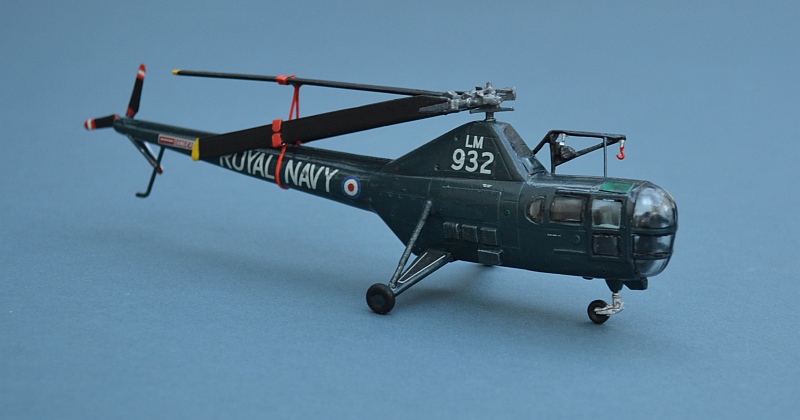
And here she is; all in all, a very enjoyable if slightly challenging build, that fills an important gap in my helicopter collection!
…………………now what about trying that vacform?
Of course, the Mach 2 kit is meant to be the civil variant of the Dragonfly (and was originally issued as a Sikorsky model). As such it needs some changes to become an RN aircraft.
Many of these are beyond my ability in this scale, but some obvious changes include fitting the rescue winch (which Mach2 kindly supply), plus a tail rotor guard and a searchlight housing under the nose, both of which were fabricated from sprue and plastic strip. RN aircraft also had additional instrumentation on the port side of the pilot, which requires part of the lower port window to be blocked out.
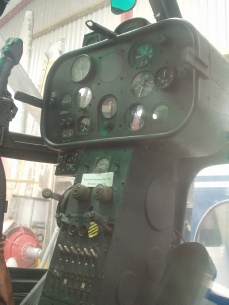
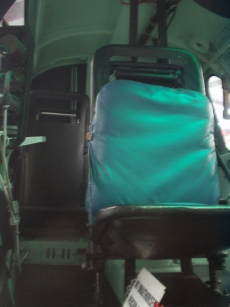
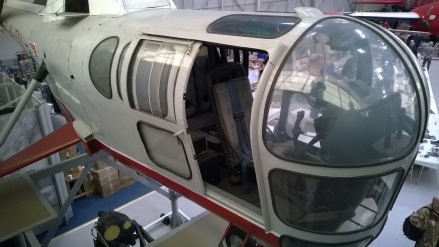
Details of the winch, instrument panel and cockpit of the Dragonfly at Weston Super Mare:
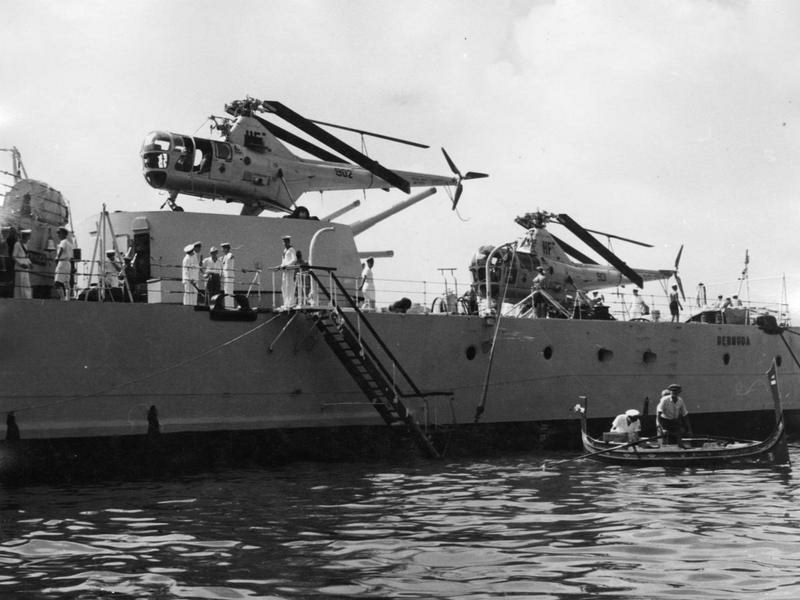
Dragonflies onboard an RN cruiser, assisting in the aftermath of a Greek earthquake © Crown Copyright IWM (A 32691)
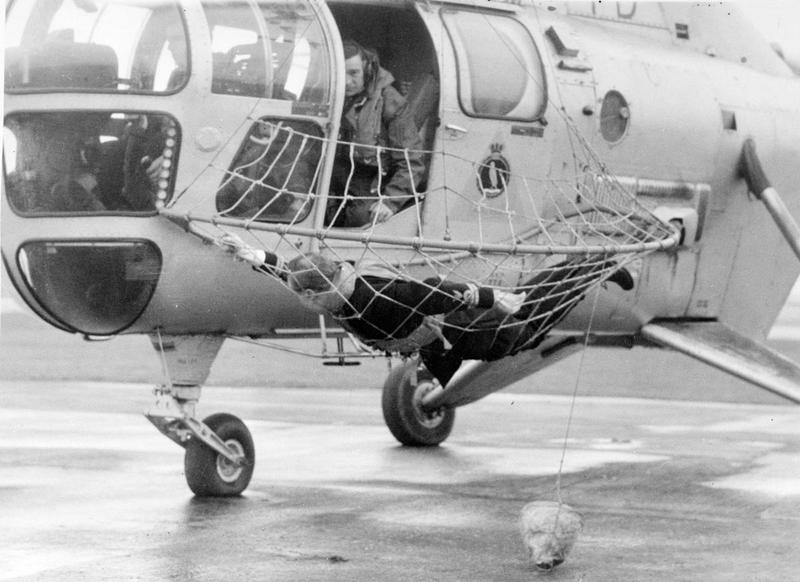
The Sproule Net scoop method of aircrew recovery from the water was pioneered on the Dragonfly © Crown Copyright IWM (A 33088)
Link to Website Index: ![]()
www.gengriz.co.uk
Background Image: Dragonfly at the Fleet Air Arm Museum,Yeovilton
Have a look at my Helicopter Pages for many more RN (and other) Helo kit builds