July 2016
Westland Whirlwind HAR.1
Link to Website Index: ![]()
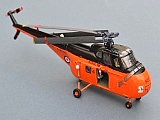
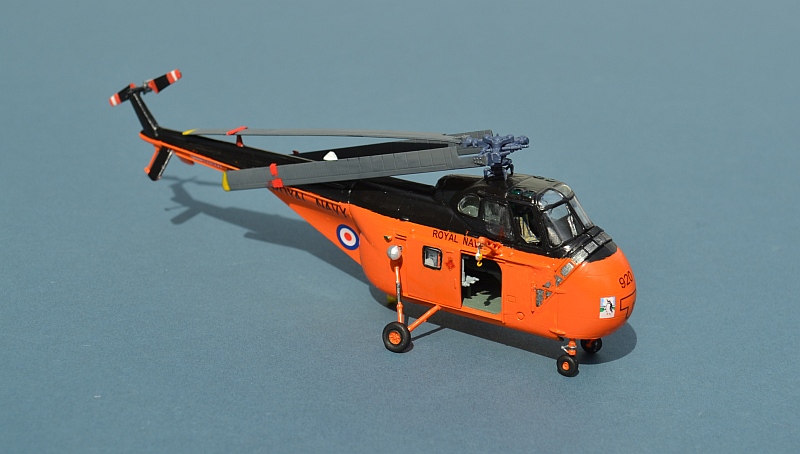
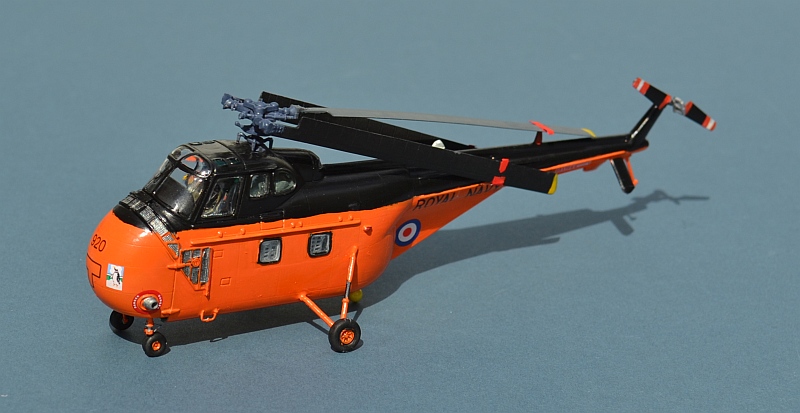
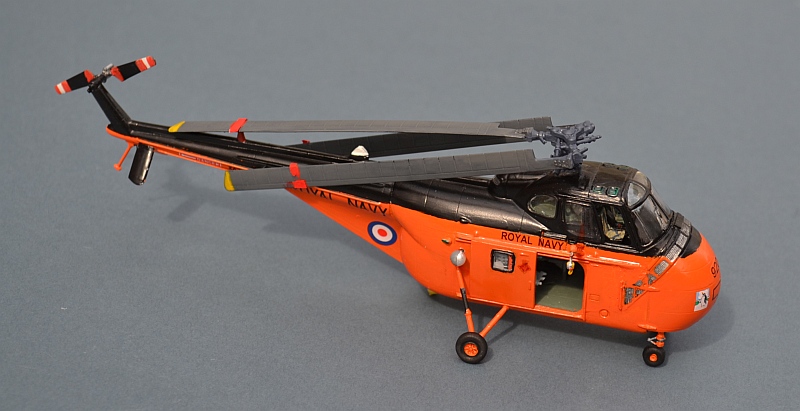
HMS PROTECTOR Antarctic Survey Vessel 1957
Italeri 1/72 with scratch conversion, Rotorcraft and home made decals
Following on from their successful licence build of the Dragonfly, in 1950 Westland
again teamed up with Sikorsky to produce the Whirlwind, a version of the S-
Early HAR.1 Whirlwinds were based on the HO4S US Navy variant, with power provided
by a 600 hp Pratt & Whitney R-
More than 400 Whirlwinds were built in total, of which a quarter went to foreign users, particularly the French Navy.
Link to Website Index: ![]()
www.gengriz.co.uk
Background Image: Whirlwind at the Aeroventure Museum, Doncaster
Have a look at my Helicopter Pages for many more RN (and other) Helo kit builds
In 1956, Westland Whirlwinds (along with Bristol Sycamores) of the UK Joint Experimental
Helicopter Unit, flying from HM Ships THESEUS and OCEAN played a key role in the
Suez landings, successfully landing and sustaining 650 men of 45 Commando Royal Marines
ashore in Port Said, in the first heli-
As well as landing the Royal Marines whilst under fire and evacuating the wounded, over 20 tonnes of equipment and supplies were transported directly into the combat zone, with several helicopters hit by Egyptian fire, but none lost.
The 10 HAR.1 Whirlwinds built by Westland were found to be underpowered, making their
use in hotter climates impracticable. Nevertheless, they were well suited to the
Antarctic Patrol role, embarked in the Ice Patrol Ship HMS PROTECTOR during the late
1950s and early 1960s and painted in a non-

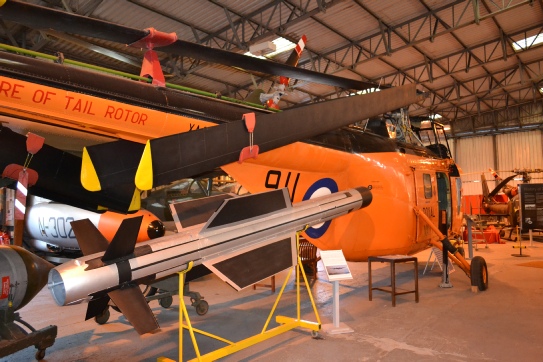
The real thing at Doncaster Aeroventure museum. This aircraft has been restored to the earliest colour scheme, which differs from my one I have used in a number of ways, including a rather simpler (but perhaps more amusing) penguin badge on the nose.


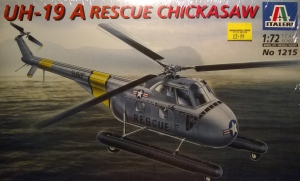
I have a number of these marvellous Italeri H-
This build uses the UH-
I had hoped that this could be a simple “minimal changes out the box” build of the RN’s Antarctic patrol version, as the early P&W Wasp powered Westland HAR.1 variants were little changed from Sikorsky’s originals. Surprise, surprise though, as the build progressed, more and more necessary changes appeared, from the removal (by cutting and sanding) of the ”bumps” on the top of the tail boom, removal of the extra protruberances (nav lights?) on the fuselage sides, through to the reshaping of the underside fuel tank to remove its rear lump, the fitting of a radar reflector (or is it a light?) behind the cabin door, snow deflectors on the engine intake grilles, homing antenna on the nose and beacon light fairings on the tail boom.
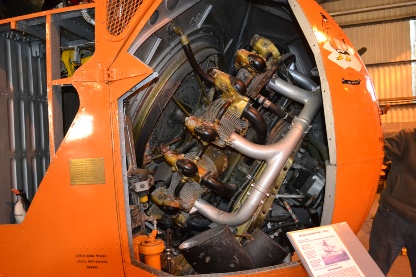
Fortunately this variant doesn’t have the extended floor of the Mk7 and beyond, a far more difficult conversion that awaits a dark winter’s day when I am more inspired, but it does have subtly different engine vents on the side of the fuselage (especially the starboard side) ! These were reshaped using a sharp scalpel then filled and smoothed back using Tippex as a filler. I also took the opportunity to add a few pipes and structures in the visible engine bay underside.
The windscreen required some delicate rework, since Westland did away with one of the frames on either side, replacing each one with two thin internal stiffeners. The kit frame was lightly sanded away, then polished back with toothpaste and my trusty multitool to restore the clear surface. This was one step I wasn’t looking forward to, but in the end it proved very simple and effective.
The kit assembles very well, with no need for filler at all. I added some simple (champagne bottle derived) foil to the port inner walls to represent the quilted cabin padding. So far as I can see the fuselage is common between kit variants, with a different tail and undercarriage section of the sprue provided as required. The internal seats are well moulded and help to strengthen and align the cabin interior before assembly. Despite searching hard online and in my reference books, I couldn’t find any clear pictures of them actually fitted to the real thing so I am not 100% sure I have the colours right (although I am reasonably sure they were not red or blue). The cockpit windows aren’t meant to be left open, but it seemed a shame to hide the detailed interior, so I fudged the pilots side appropriately.

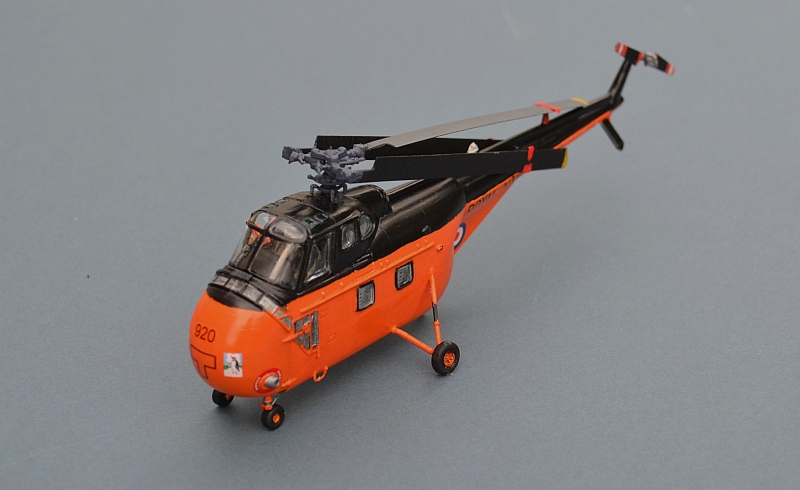

Apart from the internet, as a main reference I used some of my own pictures of the beautifully restored HAR.1 at the Doncaster Aeroventure museum. It wears an early colour scheme, but having discovered that the RotorCraft HAS.9 conversion kit in the stash has some suitable spare penguin and roundel decals, I have decided to recreate one nearer to the old Airfix kit markings, which represent a later marking scheme.
Talking of the Airfix kit, which was one of my first ever builds back in the early 1970s, sitting Italeri’s offering beside it (see below) shows some noticeable size differences, suggesting that Airfix made their one a little too small for scale.
The Rotorcraft decals don’t provide everything I need, so the missing decals were drawn up using MS Powerpoint and then printed onto inkjet paper. After a quick coat of Humbrol Satin Cote to seal them and give them a bit more strength, they were left to dry overnight before application.
As has become my habit, I decided to fold the blades, the first step of which was
of course, to straighten the pre-
This really is a very nice little helicopter kit, although it does require a lot
more work to convert to a Whirlwind than I had anticipated, even for this very simple
early variant. However, nothing was that difficult and this is exactly the sort of
satisfying modelling that I really enjoy! If I were to have one criticism, it would
be the fragility of the undercarriage, especially the nose wheels. Although I didn’t
knock them off during the build, I fear they will not last long and for the next
build I will definitely leave them off until the very end. The pre-
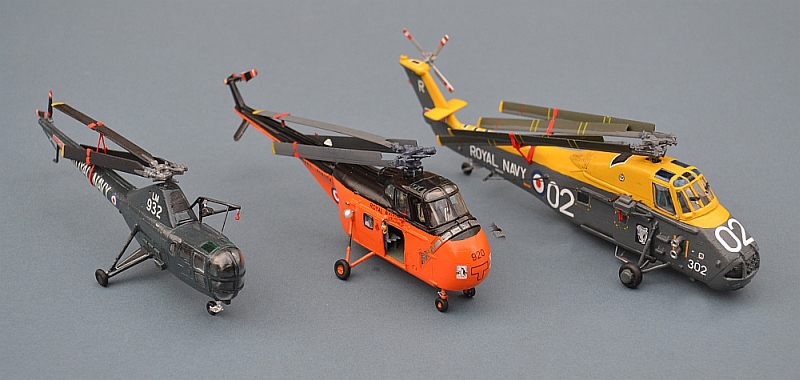
And here she is with the Wessex & Dragonfly I built earlier in the year. A colourful trio if ever there was!!!!