Link to Website Index: ![]()
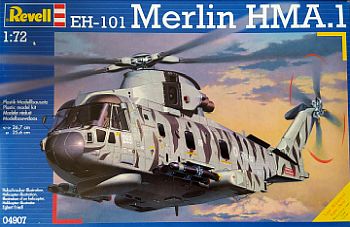
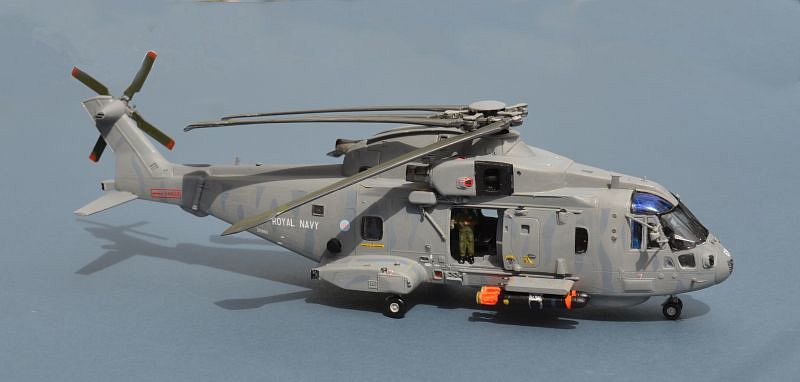
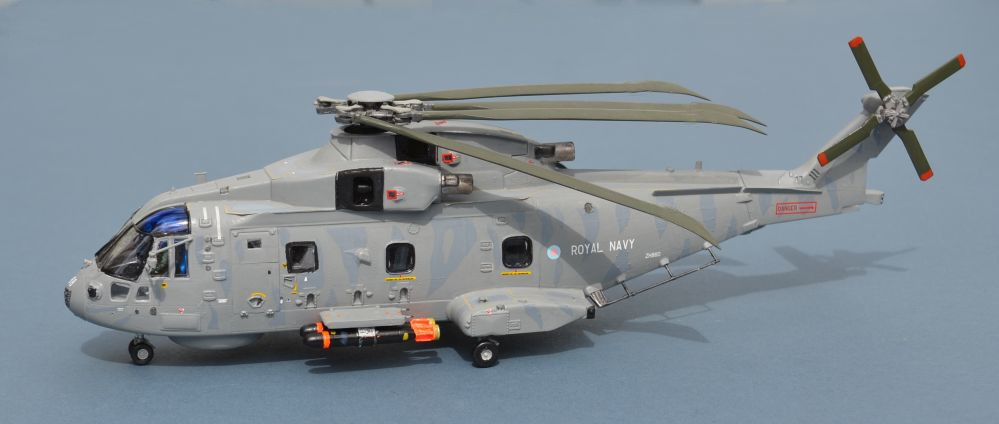
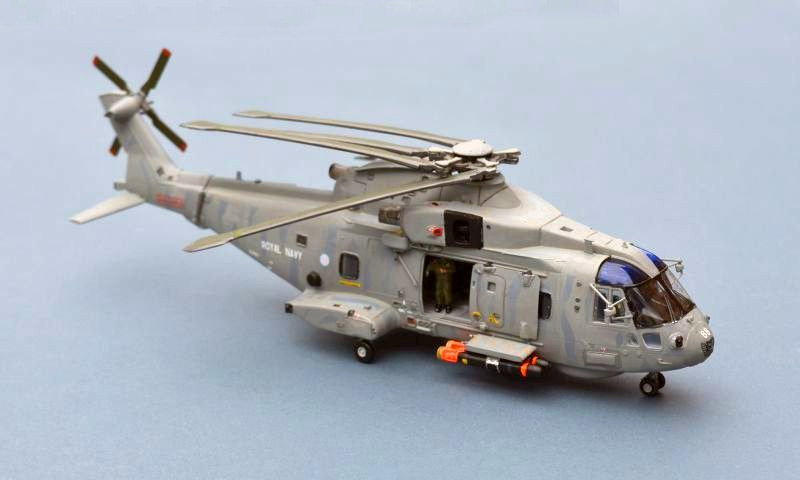
Leonardo AW101 Merlin HM.1 (Model 111)
814 “Tiger” Naval Air Squadron, HMS ILLUSTRIOUS / RNAS Yeovilton, 2012
(Aircraft deployed to RNAS Yeovilton providing security for 2012 Olympic sailing at Weymouth)
Revell 1/72 .
Link to Website Index: ![]()
© www.gengriz.co.uk
The Royal Navy operates the advanced AW101 (formerly EH101) in the Anti Submarine and Surface Warfare roles. Built by Agusta Westland, (now Leonardo Helicopters), in RN service it is known as the Merlin and is operated by 3 Fleet Air Arm Squadrons, 814, 820 and 824 Sqns, normally based at RNAS Culdrose in Cornwall, but deploying regularly to sea onboard HMS QUEEN ELIZABETH, HMS PRINCE OF WALES and from the small Type 23 Frigates, as well as from amphibious ships and Royal Fleet Auxiliaries.
With a comprehensive ASW mission suite from Lockheed Martin, Thales and IBM, Merlin is optimised for anti submarine warfare, with a Thales FLASH active dipping sonar, passive sonobouys and SELEX Blue Kestrel surface search radar. Able to carry 4 Marconi Sting Ray torpedoes, 4 Mk.11 depth charges or a mixed load, it is widely acknowledged as the most capable ASW helicopter currently in service around the world. Stripped of their ASW equipment (it is designed to be removable within a few hours), Merlins are also able to carry a large load of troops and equipment.
From 2007 onward, 30 Merlin HM.1s underwent a capability enhancement programme to become the HM.2 variant, achieving full operating capability in 2015, ready to embark on the RN’s new aircraft carriers..
Building the Revell / Italeri Merlin Kit:
This is the 4th Italeri/Revell EH-
The Merlin kit first appeared in an Italeri box in 2001, nominally as a HAS.1, representing one of the early trials aircraft, with decals for 700M Sqn operating from Type 23 Frigate HMS NORTHUMBERLAND and no weapons pylons or torpedoes. I built my first one shortly after it was released and was really pleased with it, but my modelling skills have moved on and last year I decided it could be sacrificed to create a “Crowsnest AEW” conversion and that I would do a new model HM.1 with a full weapons fit using one of the more recent issues.
The ASW kit shares several sprues with the Revell HC.3 kit that appeared a year earlier, with the fuselage broken into two main parts, allowing either the
troop carrying ramp or the ASW tail (with stowage fold) to be fitted, depending on
which kit you have bought. Different inserts in the fuselage sides allow the varied
window and door configurations to be accommodated. It has also appeared as a Canadian
Cormorant SAR helicopter, an Italian Navy utility/troop carrier, the villain's helicopter
from James Bond and also as the cancelled AH-
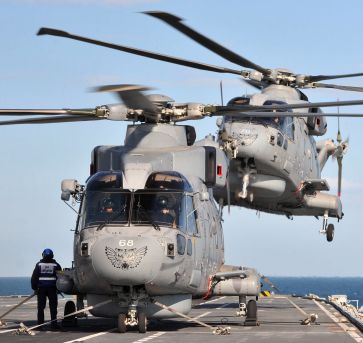
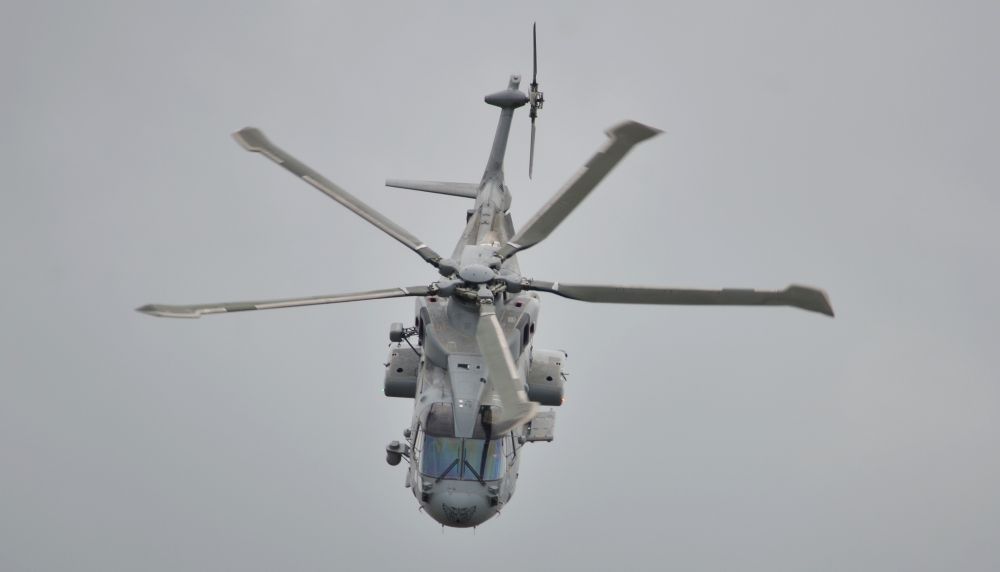
Two Merlins of 814 Sqn land onboard HMS ILLUSTRIOUS
(© Crown Copyright MOD 45153852 used under OGL)
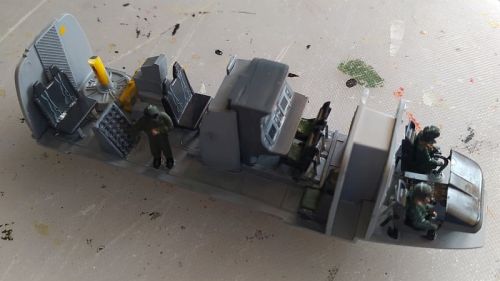 A pilot and co-
With the interior finished, the fuselage halves can be joined together. No problems here, although note that the placement tabs are on the starboard fuselage, so the inserts should go in here first. You will of course, have fitted the forward undercarriage bay before joining the two halves (hahaha, yes I forgot). There is about a 1mm gap between the top of this and the cockpit floor, so I fitted a small plastic card shim to hold it in place. The rear fuselage is a separate assembly, which is attached after you have joined its two halves. Again, fit is good, but needs a little pressure to ensure that you get a smooth and gapless joint. Revell would have you drill a hole for the Crash Position Indicator (the black button) on the starboard rear half, but I reckon this is overkill (and I suspect the part is a little too small), so simply sanded mine flat and glued it to the surface.
The canopy is fairly easy to paint, thanks to prominent frames, but remember to painting
the distinctive black surrounds seen on RN Merlins. Windscreen wipers need a little
care as they are delicately raised from the surface. Some light dry brushing works,
although I did have to re-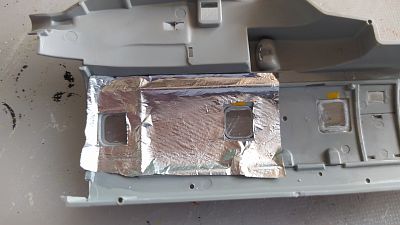 I used a blue permanent
magic marker for this. Its quite an effective technique, although the real thing
is perhaps not as blue as mine. The prominent interior sun blinds can be achieved
using simple folded brown paper, attached to the rear bulkhead before the canopy
goes on. Unfortunately, in my enthusiasm to get the canopy on, I forgot these and
the roof switch panel (with decal); fortunately the missing panel is not obvious
!
I used a blue permanent
magic marker for this. Its quite an effective technique, although the real thing
is perhaps not as blue as mine. The prominent interior sun blinds can be achieved
using simple folded brown paper, attached to the rear bulkhead before the canopy
goes on. Unfortunately, in my enthusiasm to get the canopy on, I forgot these and
the roof switch panel (with decal); fortunately the missing panel is not obvious
!
As you proceed onto the various antennae and other protuberances that adorn the exterior
of the aircraft, it becomes more and more difficult to handle the kit without doing
damage. It also becomes obvious that this issue of the kit is far better than the
original Italeri one -
For my previous kit I allowed the tail to fold -
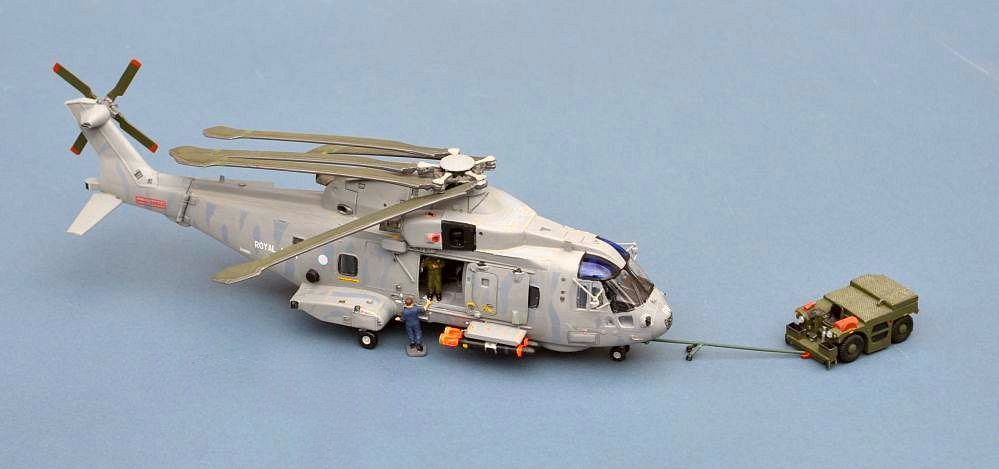
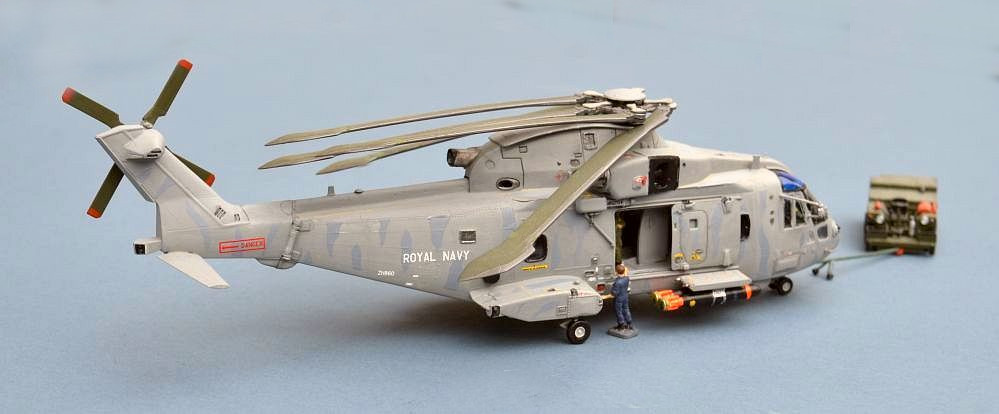
The four GEC Marconi/BAESYSTEMS Sting Ray torpedoes and their pylons are a welcome
addition over the earlier kit, since these are the "business end" of the Merlin.
However, the kit parts' shape seems a little suspect to me and the painting instructions
are definitely badly wrong. Sting Rays, even drill ones, are satin black overall.
Inert Exercise torpedoes (they float to the surface after dropping) have dayglo
ends, a blue band and a yellow notice telling any finder to report to the police
or coastguard. A frangible plastic Flight In Air Material (FIAM) cap covers the
sensitive sonar transducers at the front end of the torpedo, however drill ones don't
always carry these (they break or fall off). 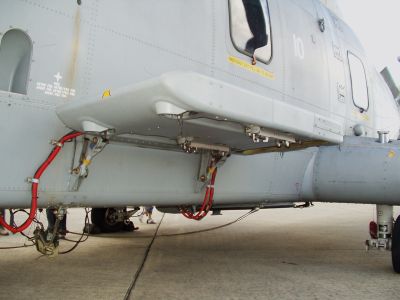 Sting Rays also have a large aluminium
coloured "strap" to hold them to the aircraft and a white CofG marking to assist
when hoisting them onto an aircraft pylon or a STWS Torpedo tube. The flat plate
at the back holds a retarding parachute that ensures the torpedo enters the water
at the correct angle. It should be a yellow anodised colour, with a green/olive
cloth cover on the back. A cable goes to the extending bar on the pylon. There are
also prominent red cables emerging from the fuselage bottom and leading to the pylons
-
Sting Rays also have a large aluminium
coloured "strap" to hold them to the aircraft and a white CofG marking to assist
when hoisting them onto an aircraft pylon or a STWS Torpedo tube. The flat plate
at the back holds a retarding parachute that ensures the torpedo enters the water
at the correct angle. It should be a yellow anodised colour, with a green/olive
cloth cover on the back. A cable goes to the extending bar on the pylon. There are
also prominent red cables emerging from the fuselage bottom and leading to the pylons
-
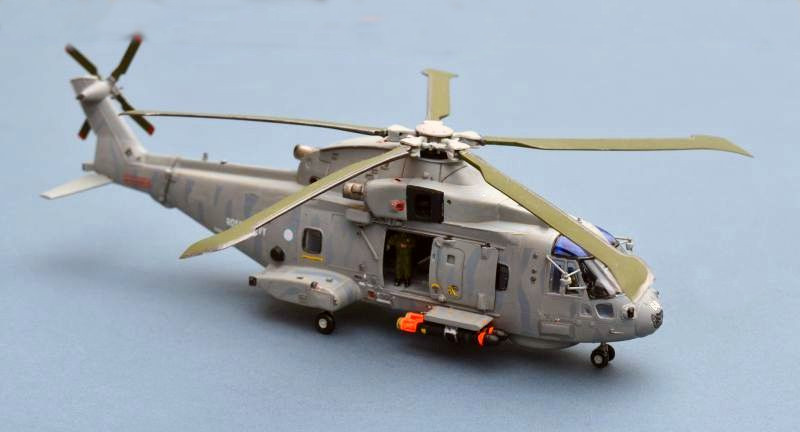
As on my previous kit, I painted the cabin window surrounds black as per the real
thing. The moulded kit surrounds are far too prominent, but difficult to sand down
without damaging other detail -
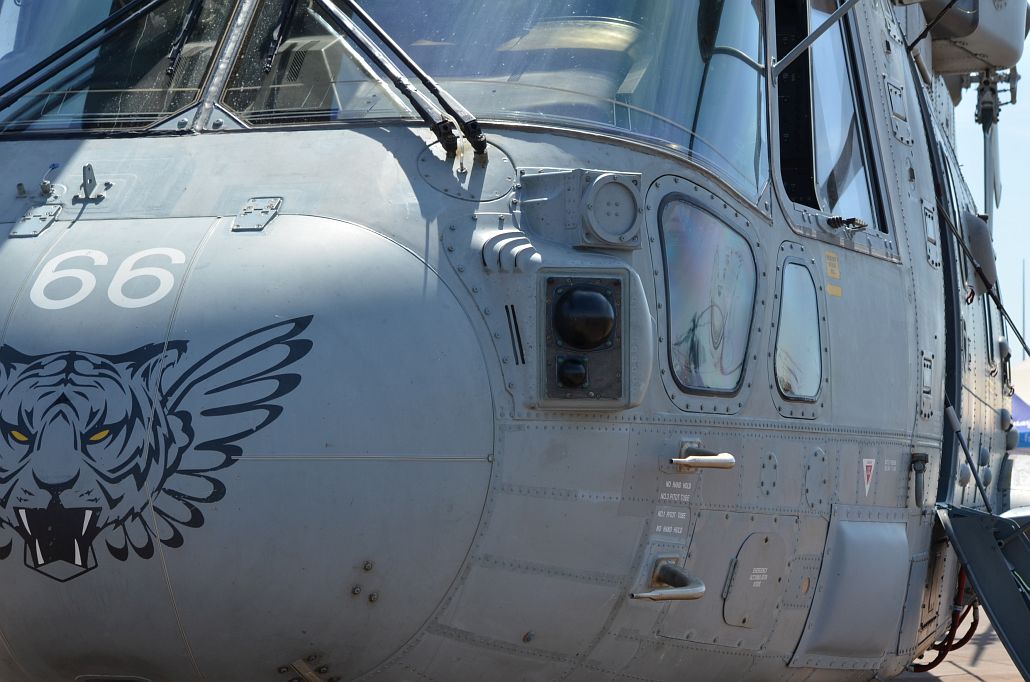
Decals are a bix of a mixed experience. As with most Revell kits, they are well printed and comprehensive. The Tiger stripes went on without any issues, although note that these need to be applied before any other markings. However, they do seem to have a major issue with the upper fuselage walkways. These decals are too large for the kit, and also have bright yellow lines on their perimeter. Whilst some real Merlins do have yellow lines, they should not be as large or as bright. I dulled mine down with a thinned grey overcoat. Unfortunately, the Tiger stripes are too light in colour, so that they are difficult to see on the completed model. The real thing does seem to have varied during its life, from very high contrast to less obvious, but these are just a little too light.
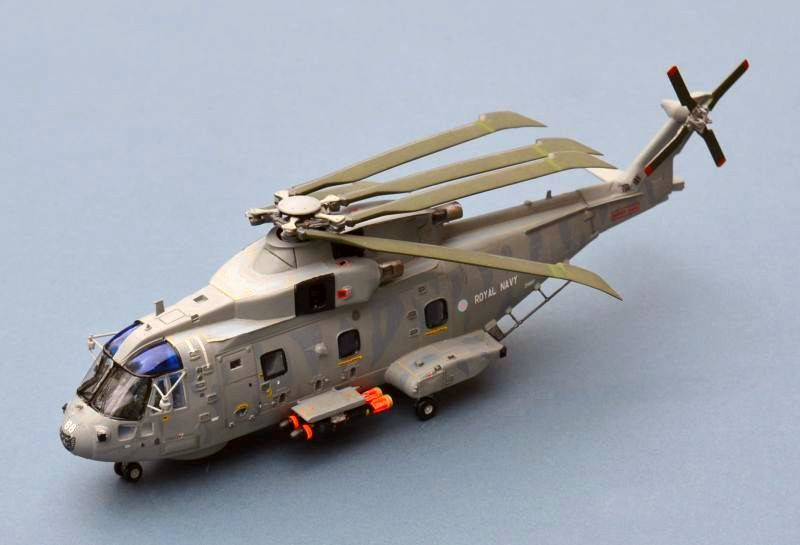
Instead of the "Blue Nose" (actually dark grey) on the kit scheme, I built mine as
a slightly later aircraft (from 2012 when they provided security overwatch for the
Olympic sailing at Weymouth), by which time this aircraft wore 814 Sqn’s tiger motif
on the nose. 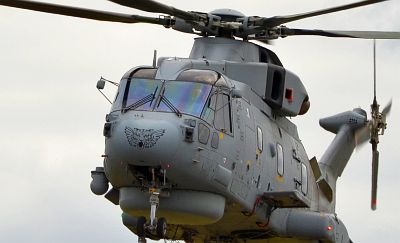
The tiger decal came from a Model Art set and although it was quite difficult to get it to conform to the nose shape, I prefer the look of it.
Paint is Humbrol 164 Medium Sea grey, a colour that I find varies considerably between tins and coats. Two thinned brush applied coats was sufficient to give good coverage. The real thing has quite varied panel colours, but I shied away from trying to emulate this.
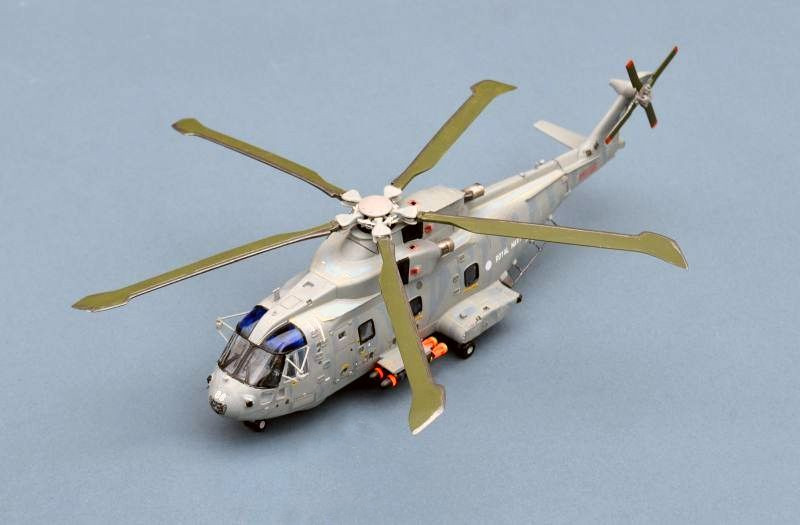
Alongside the detailed painting of weapons, I always find that rotor blades are worthy of particular attention on helicopter kits, since they are so prominent when completed and make such a significant contribution to people's perception of the kit when finished. The composite BERP blades fitted to the Merlin are a very significant feature and it is worth spending some time to get these correctly coloured. I assembled these after the main fuselage was complete, keeping them unattached for storage and transport, and also allowing me to swap with a folded set on my other Merlin kit when I want to!
This is a really enjoyable kit of acceptable accuracy for most modellers. It needs a little care in assembly, but nothing too hard. Roll on my next one, which will be an HM.2, with all the added external equipment.
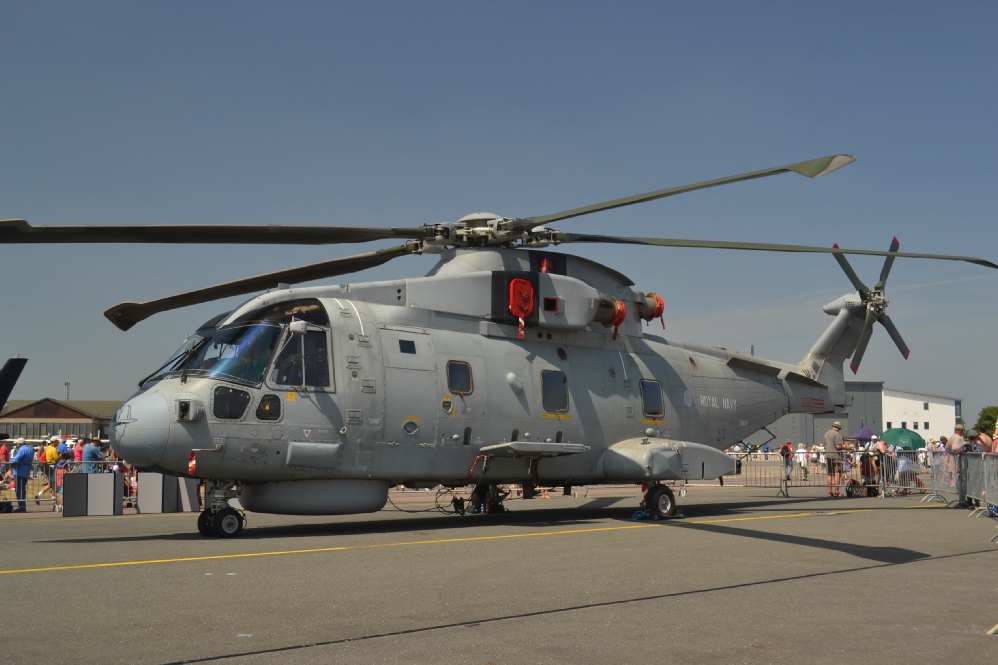
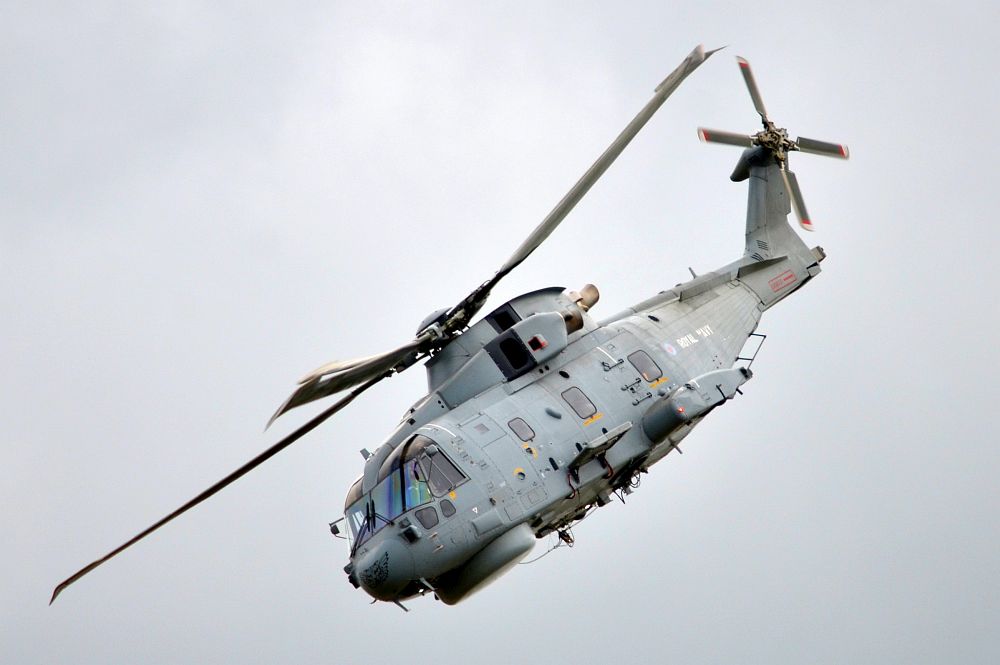
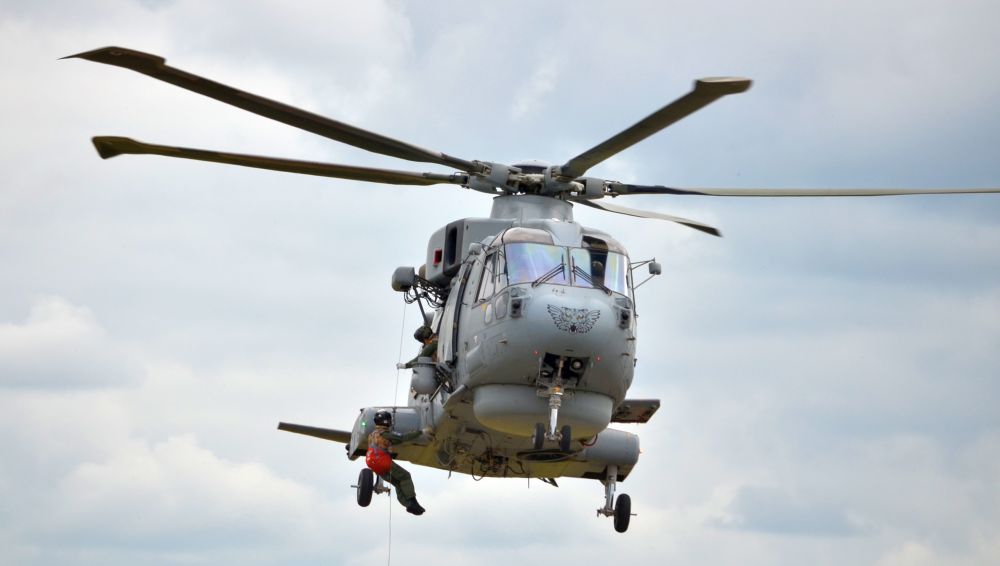
The real thing -
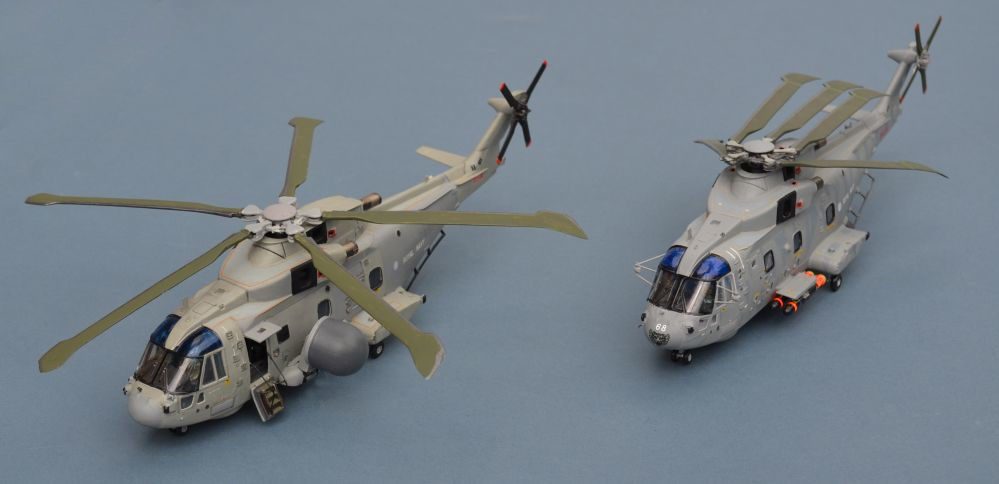
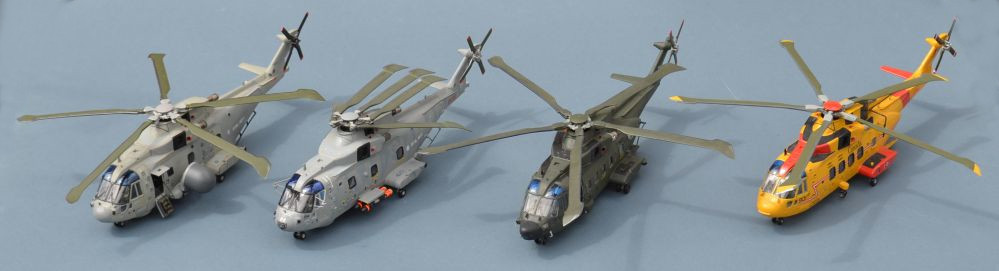
Merlins and a Cormorant -
With my Crowsnest ASACS /AEW Merlin:
Background: Merlins of 814 Sqn land onboard HMS ILLUSTRIOUS
(© Crown Copyright MOD 45153852 used under OGL)
Part 1