July 2022
MiG-
Link to Website Index: ![]()
Lviv State Aircraft Repair Plant -
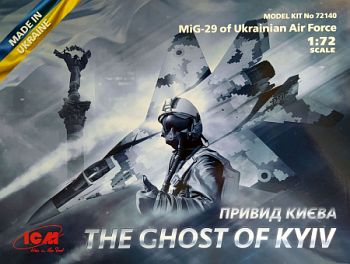
The Ghost of Kyiv, Spririt of the Ukrainian Air Force, 2022
ICM Special issue 1/72 (50% of profit from these kits has gone directly to the Ukrainian Armed Forces)
Link to Website Index: ![]()
© www.gengriz.co.uk
During the early part of the Russian Invasion of Ukraine,in February 2022 ,the Russians undertook a major assault on the Kyiv region. Despite overwhelming Russian force and major damage, the attack was fiercely repulsed by Ukrainian defenders.
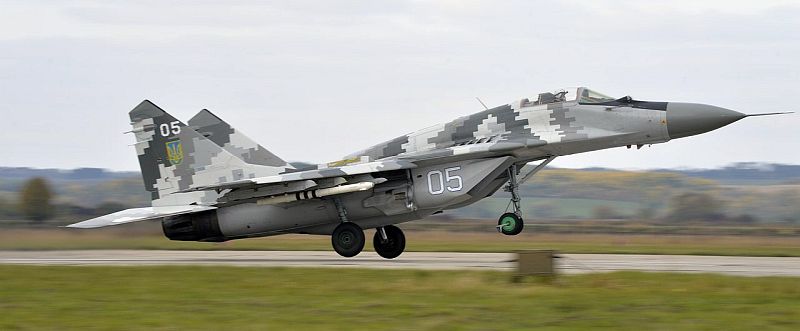
A key element of the Ukrainian response was the deployment of locally upgraded MiG-
Whilst it is doubtful that the Ghost is one single person, there is no doubt that the Ukrainian Forces have put up a remarkable defence against Russian aggression, at great ongoing cost to themselves.
Whether the Ghost of Kyiv is real or not, it remains a potent symbol of Ukrainain resistance, both at home and around the word.
The MiG-
MU2 aircraft also have limited ground attack capabilities.
Building the ICM “Ghost Of Kyiv” MiG-
The ICM MiG-
I believe ICM actually produce their kits in Kyiv, which is certainly the location
of their head office. If any of you follow the Facebook page of another Ukrainian
manufacturer, Modelsvit, you may have seen their distraught live post in March from
Kharkiv, showing Russian armoured vehicles firing on the building that they used
to manufacture and store their kit moulds. I really wasn’t looking for another MiG-
The kit comes in a very nicely presented and illustrated high quality box, which
in the UK is selling at a very reasonable price (UK £20), with the actual parts packed
within a sturdy white cardboard top-
Surface detail consists of lightly engraved but sharp lines and a nicely detailed
set of cockpit instruments are provided as raised detail and as a decal. The plastic
is a very soft light grey -
I did have some difficulty matching the upper and lower fuselage halves; what seemed to have happened was that the upper forward section had splayed slightly, so that the locating pins didn't meet. To overcome this I joined the aft sections first, then the nose, then a light squeeze on the forward top part as it was pushed together seemed to do the trick, followed by a spring clamp to hold it together until it was willing to stay there on its own! Unfortunately I couldn't fully get rid of the step in front of the cockpit on one side, which needed a little filling (with Tippex) and rubbing back (be careful with this though, as the plastic is quite thin).
The breakdown of this kit is very different from the Italeri one that I built a few years back. The two wings are separate parts, and the intake sides are provided as a set of 6 very thin parts that need to be assembled carefully before attachment (having first removed the internal ejector stubs that will interfere otherwise); I doubt that many will manage to get these together without a seam down the bottom that will require filling and smoothing afterward. I attached the intakes to the fuselage before sanding, just to give them a bit more rigidity as I did so. Note that the instructions forget to tell you to add the front undercarriage bay top piece.
© US DoD 4805805 Photo by Tech Sgt Charles Vaughn USAF
(The appearance of U.S. Department of Defense (DoD) visual information does not imply or constitute DoD endorsement)
Background: An Su-
On 25 Feb 2022, he lost his life when shot down by a Russian S400 missile to the north of Kyiv.
Wings, fins/rudders and tailplanes are attached via small locating tabs -
A reasonable load of ex-
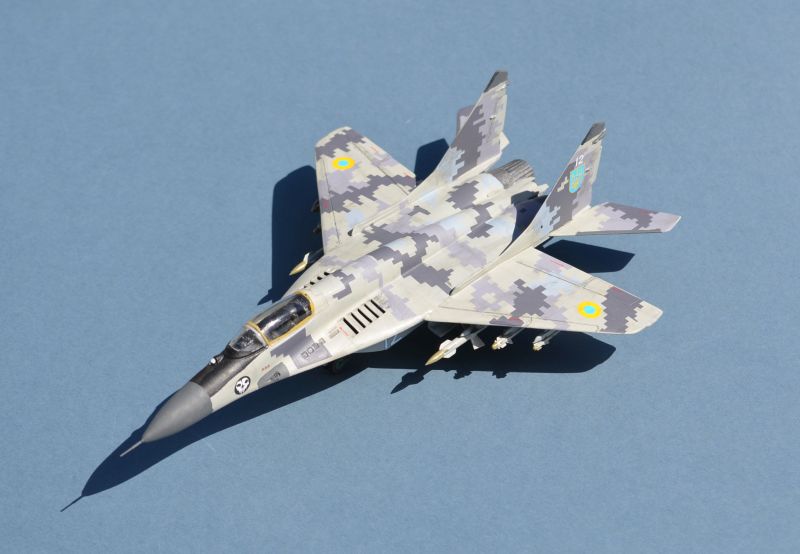
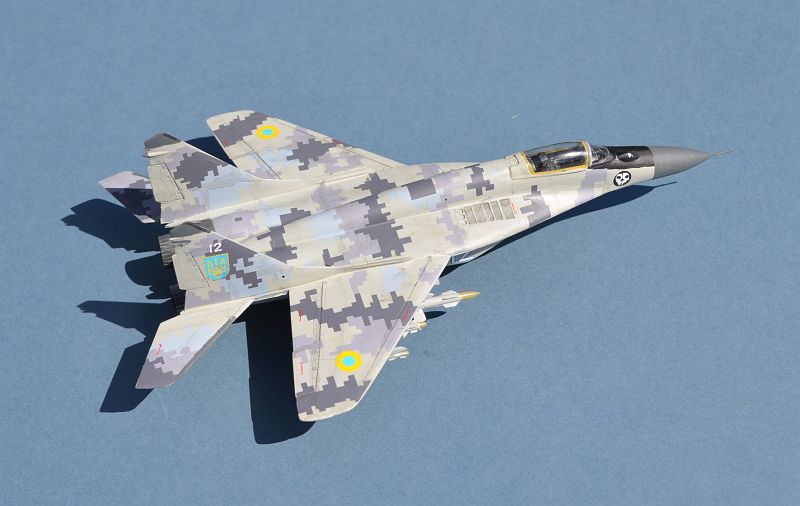
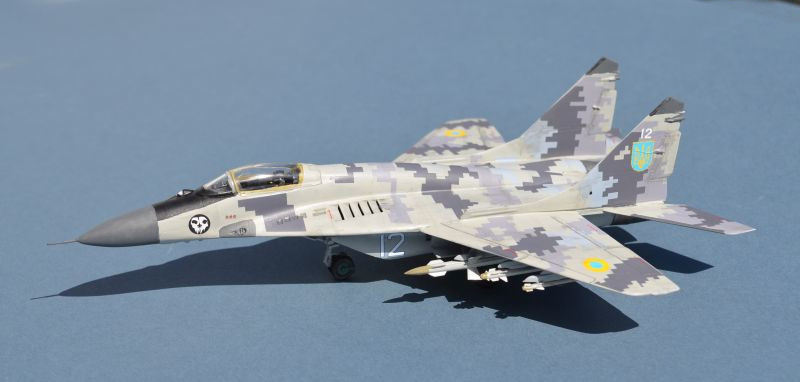
Apart from wanting to show support for Ukraine, I suspect that most modellers will buy this kit for the digital camouflage decals. I also suspect that these may put a few less experienced modellers off! The really good news here is that they are very good decals, stretchy, thin, strong and relatively easy to apply. They have been broken down into logical smaller sections that make application much easier than a large block decal. As always I used a mix of water and Johnson's Klear to help application and ensure I could still move them after initial application. The decal shapes are good and conform well to the model surface. I had some small difficulty with the main central upper section, which went on well enough, but I'm not sure I got the alignment with the intake louvres correct.
The painting instructions are comprehensive and in colour. The main upper colour is listed as "off white", which I have interpreted as a very light grey (I used Humbrol 166 Light Aircraft Grey). For the underside I used (appropriately perhaps) Humbrol Ghost Grey. After applying the decals, I weathered the aircraft with a grey oily wash in the panel lines plus a few smudges, then applied a top coat of Windsor & Newton Acrylic Matt Varnish to seal everything in. All paints were thinned and brush applied, for once only needing a single coat.
I’m pleased with my kit and send all my best wishes to Ukraine, with the hope that, in the not too distant future, this criminal and pointless nonsense by Russia will stop and allow Ukrainians, Russians and everyone else around the world to get on with their lives in peace.


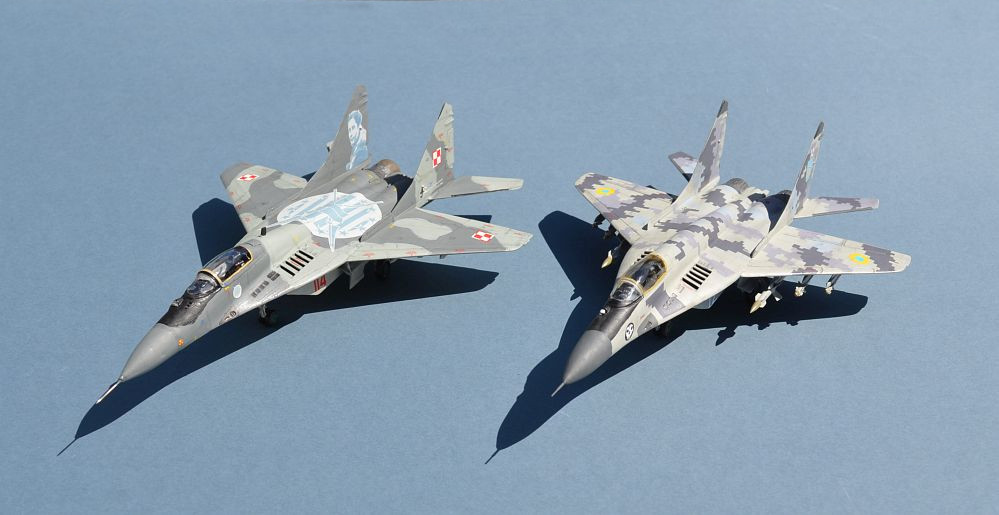
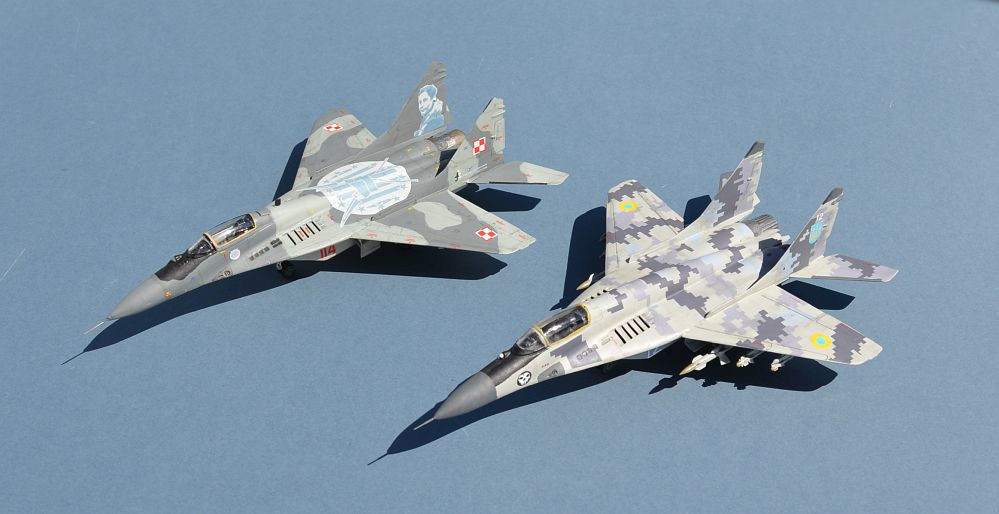
My Ukrainian Fulcrum C alongside my Polish Fulcrum A