June 2009 - Part 2
![]()
Back to June Builds Part 1 - Buccaneer S.1 & LCVP
27 June 2009 - British Armed Forces Day
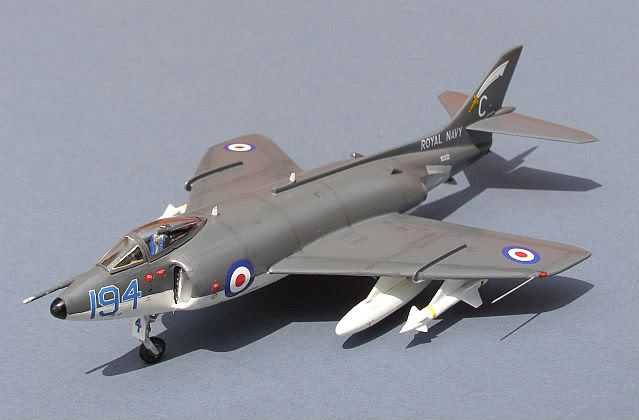
Supermarine Scimitar F.1, 807 NAS, HMS CENTAUR, 1959.
Xtrakit with minor decal changes
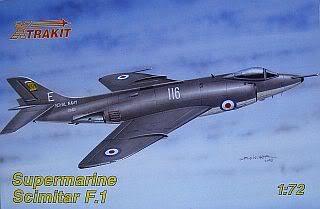
To finish the month off, I have acquired one of Xtrakit's (Hannants') latest issue Scimitars. Like all of the recent Xtrakit releases, this one was greeted with howls of excitement when it was announced. However, like most of the recent Xtrakit releases, it is certainly not perfect (for example it is rather expensive). Nevertheless, I'm confident that it will easily knock the spots off my older Vacform one.
For a detailed critique of the kit, see Damian Burke's excellent website.; his disappointment with it is very clear. It is very definitely a limited, short run production that needs some skill and experience to build and is of variable accuracy. It was obviously designed to a price (quite a high retail one FWIW) and the moulds are a little rough in places, although there is very little flash. As several modelling websites have reported, there is a moulding flaw/mould damage on the port forward fuselage - its not a big deal, but surprising at the price (hope you got a big discount from Sword Mr H!). Engraved detail is lightly done and looks good. Scimitar experts will be disappointed, but the rest of us can probably live with it.
Decals will need a little thought because as supplied they represent a preserved aircraft, in the scheme painted for its appearance at RIAT 2003. Its not quite correct for an in-service aircraft (shame because the decals look very nice and the roundels are in register!. I have the Model Alliance 800 Sqn markings as a possible alternative, but they are pretty dull (just a red tail and lettering!). I intend to build straight out the box. No changes, no putty noses maybe a little detailing here and there, but nothing more.
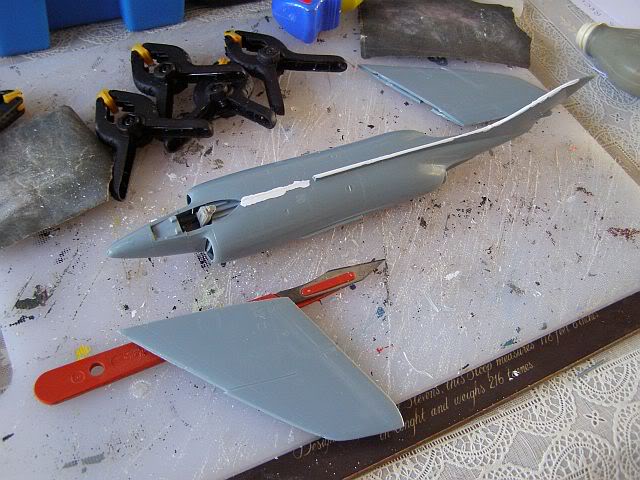
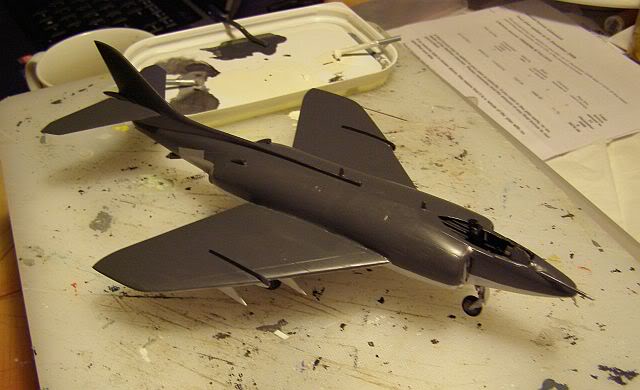
Construction looks quite straightforward at first; you start with the reasonably detailed cockpit, and immediately you run into problems; the assembly is flimsy, with no real guiding tabs to keep it in shape. It is not clear whether the resin seat should sit flat on the floor or line up with the rear bulkhead (I chose the former, then ripped it apart and re-did it as the latter). The cockpit floor and bulkhead have guiding lips on the port intakes, but these don't match its shape. I have no idea if I have fitted it correctly; we will find out when the canopy goes on.
The intake trunking is welcome, but difficult to fit and with big ejector towers. I really struggled to get the internal separating plates to fit squarely; they came off and back on again twice before I was happy. The method of attaching the compressor faces seems over complex (you assemble them on one side then try to slide them into the other intake trunk as you mate the two fuselage halves). The jet pipes were easier, but they do need to be inserted from the inside, and the joint will be difficult to hide. The rear end of the engines simply butt-joins on inside. The front undercarriage is boxed in with a crude 5 sided box that doesn't seem to have any locating points and needs very careful alignment.
Once the fuselage parts have their ejector towers removed, they can be joined (with only a small gap behind the cockpit). One rudder is slightly bigger than the other and doesn't line up (but shouldn't be difficult to fix). The wings also need their ejector towers removed and went together easily.
Attaching the wings and tailplanes has been.... interesting. Sword/Xtrakit have provided a small lip to place each of the wings, however they are too small to be of use and thicker than the gap inside the wings in any event. I tried whittling both away until they fitted, but eventually gave up and ground them off entirely. The problems associated with aligning the ensuing butt joint are no greater than they would have been with the lip. The tailplanes are a similar story. A pin exists on each tailplane, but no corresponding hole. Not difficult to make one (and the correct position is engraved), however it quickly becomes apparent that the line of the inner tailplane doesn't match the line of the fuselage, with one side worse than the other.
After Tippex and a little sanding back, the aircraft is beginning to take shape and the kit is beginning to grow on me. The tail planes look surprisingly large to me, and the fin is not quite the right shape. The wing fences went on without any difficulty and the various other external intakes and vents were then added to the fuselage. The instructions are not altogether clear on the assembly of the rear "bumper", but having studied my reference photos I was able to determine how it should be attached and it looks quite convincing. The pylon undersurfaces are quite rounded, whereas the wing is quite flat, but a little liquid glue and finger pressure allowed them to be applied correctly. I also understand that there are different types of pylon for the real thing, but the kit ones are all identical, so it may be worth checking references here.
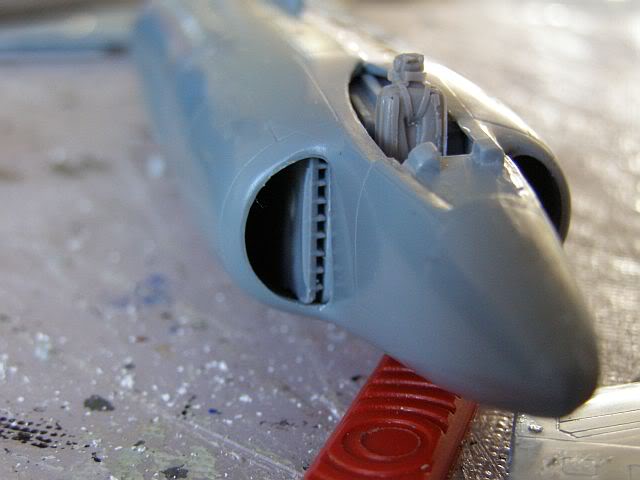
The canopy looks good - It has been suggested that it could be too small (as in the CMR resin kit), but it looks OK to me and matches the Contrail and Falcon vacform parts well (and vacform canopies, in my experience, are often slightly too large). The plastic is also very clear and quite soft, which is a good thing as brittle canopies are one of my pet hates (they can be very difficult to remove from the sprue neatly)! The parts come separately bagged in a small bag stapled to the outside of the main sprue bag - watch out here as they could easily be overlooked when you open the box! The resin seat looks very skinny, and has been in and out several times as I am still not clear how it should be fitted. The forward cowling over the instrument panel is now showing the results of its difficult assembly - it fouls the front canopy part and will need to be trimmed back.
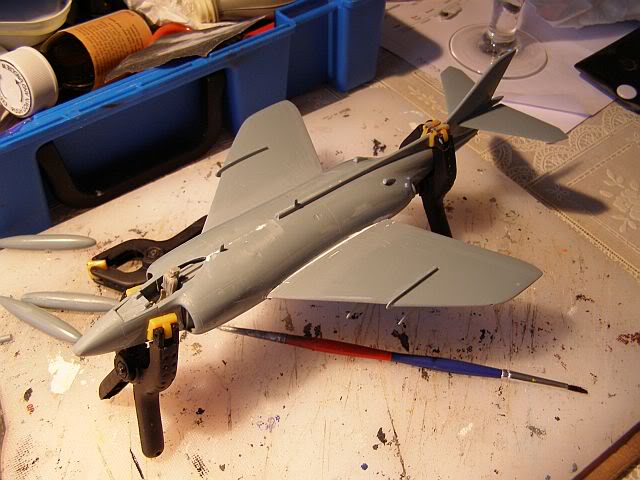
As built, the kit is a tail-sitter, so I have filled the nose with lead shot (whilst re-doing the instrument panel cowling) and the aircraft now sits firmly on its undercarriage. Of course, having completely assembled the fuselage and all its appendages, I am now having doubts about the rear intake scoops (just above the air brakes). Not only do they look too big, but these seem to be quite rare on Scimitars (a late service modification perhaps?); more importantly, they don't appear on any of the photographs I have of any of the options that I was thinking of doing. Actually I have found one photo of three 807 Sqn aircraft in close formation - 2 don't have the scoops, one does. A salutary lesson on checking your references before and during building, not just before decalling!
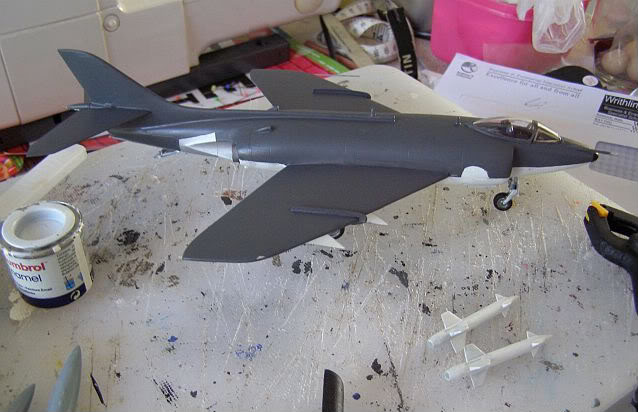
Both top and under surfaces now have a second coat of paint applied. The cockpit is finished and the canopy applied, and the underwing stores are making progress (two fuel tanks from the kit, plus a couple of Bullpups from a Frog/Hasegawa Skyhawk).
The canopy looks good - not too small, as several reviewers had feared.
Note the painted white circles for the fuselage roundels - I have fallen for that mistake too many times; nobody's roundels are opaque enough to cover an EDSG/White boundary!
After a quick coat of Klear, I have applied the decals. There are still a number of detail areas to be touched up, but I will do this at the same time as the post shading/oily wash. I have decided to go with the kit decals as supplied, as I do like their Scimitar emblem, and I don't believe I have any other 807 Sqn models in the collection, or indeed anything else from HMS CENTAUR. I have briefly toyed with the idea of trying to recolour the blue side numbers, which I also think are too big, but decided against it.
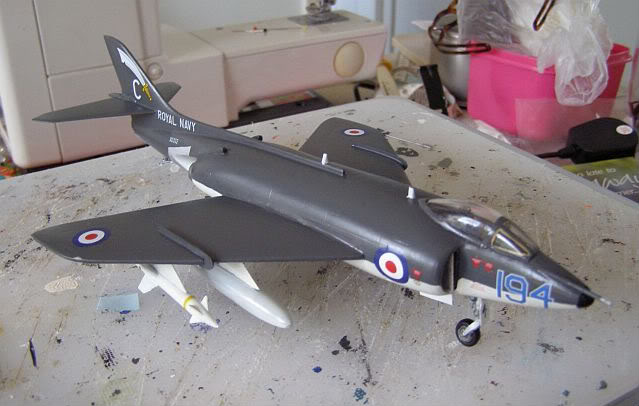
The decals went on without any significant issues, and are nicely thin with good colour density, although they are also quite brittle - I broke a couple whilst trying to re-position them. I also found that one of the roundels didn't settle down over the surface well (despite some Decalfix) and as a result it has a slight kink in the surface. Next up will be a light oil wash in the seams, before a final satin coat.
And with the final coats on, she looks pretty good. This is using the Microsol satin varnish again - I am most impressed with it!. In conclusion, this is really quite a reasonable kit; it may have some accuracy issues and its certainly not that straightforward to assemble, but it does look nice when completed.
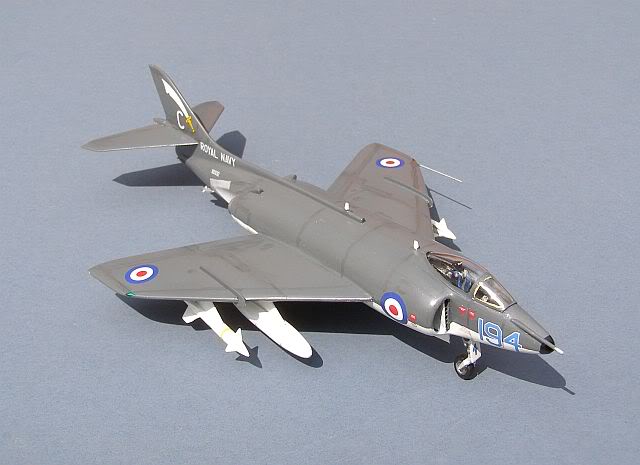
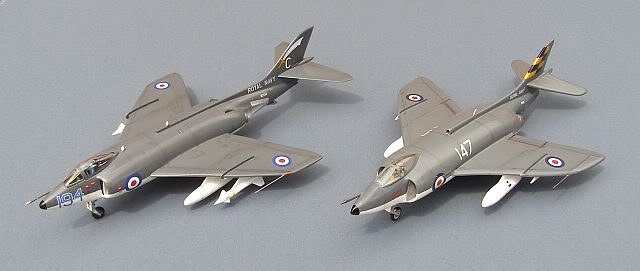
And together with my old Contrail vacform; if you have one of these in the stash, I am afraid that it no longer makes the grade (even if Xtrakit are charging £20 a pop)!
More Scimitar Pictures on the RN Jets Pages
Back to June Builds Part 1 - Buccaneer S.1 & LCVP
or - Return to Fred's Builds Index
www.gengriz.co.uk