July
2008
![]()
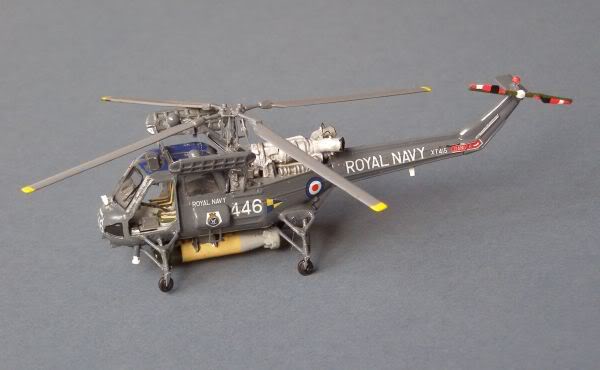
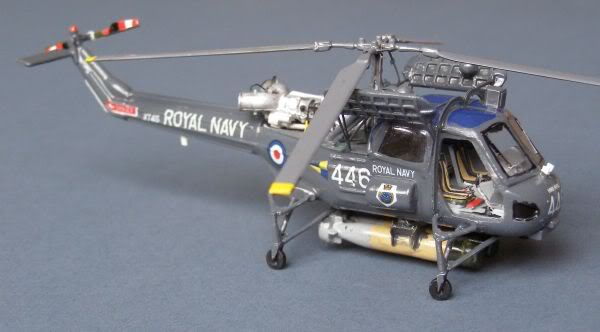
Westland Wasp HAS.1 829 Sqn FAA, HMS RHYL Fishery Protection/Cod War 1978 - Airfix with Airwaves conversion
I bought this kit and the superb Airwaves conversion several years ago, but have always held off building it for fear that I wouldn't do it justice. Well, "now's the time and now's the hour", as they say.
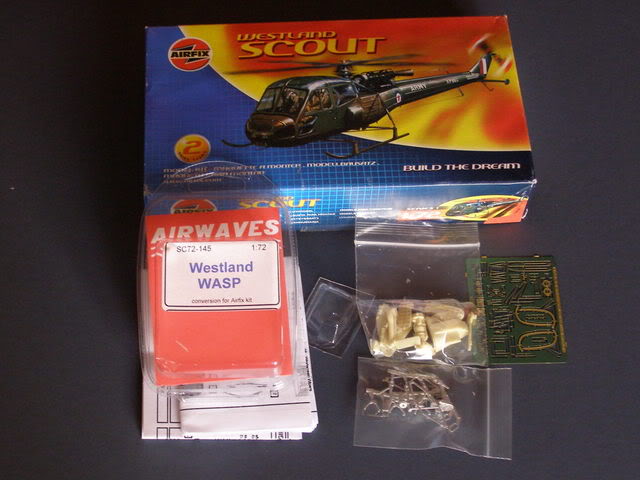
The Airfix Scout kit is a reasonable but simple representation of the real thing. Airwaves' conversion provides a very clear replacement vacform canopy, new resin tail, engine and rear underfuselage, a photo-etch sheet and a big bag of pewter/white metal/resin parts to build the Wasp's distinctive undercarriage and various other protruberances.
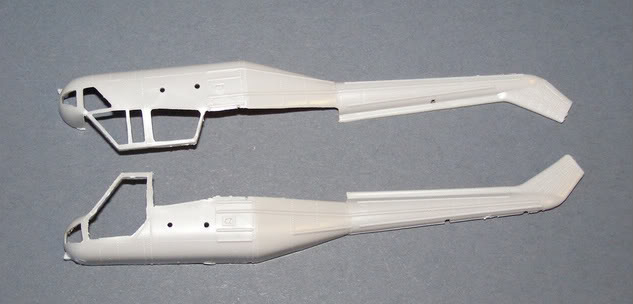
First stage is to remove the kit's rear canopy frames and the forward doors (Wasps seldom flew with the doors fitted, the ability to exit the aircraft quickly if it ditched, being held in higher regard than cabin warmth!). This is quite a delicate stage, as the kit is quite fragile; the conversion kit recommends you to retain the existing door frames, which requires some very careful cutting and whittling.
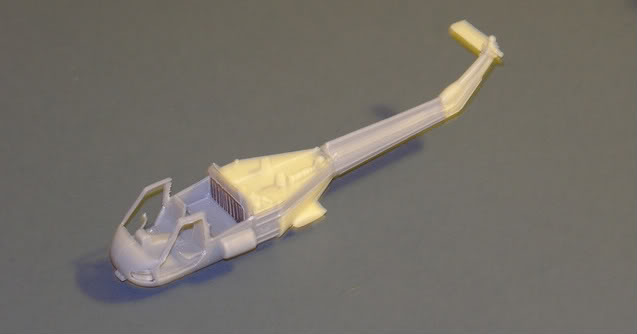
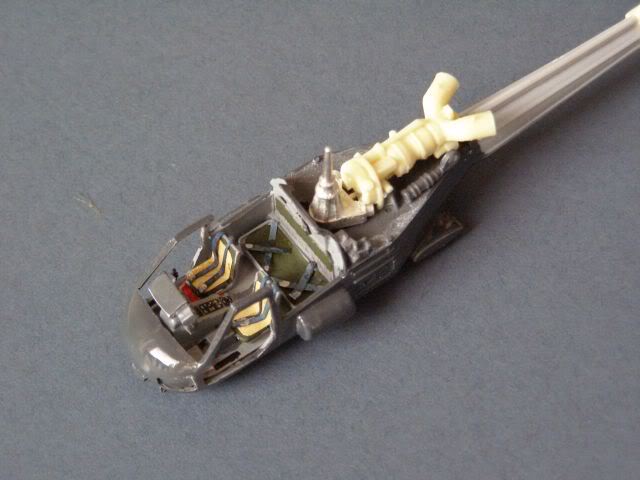
After joining the main parts together, the fuselage has to be carefully split into 3 parts, allowing the main resin replacement parts to be fitted. The resin is superbly moulded and fits perfectly (better than some of the parts it replaces).
At this stage I also detailed the rather basic cockpit, adding the rear seats & backrests, rudder pedals and various other bits and bobs. The kit seats are too thin so I added a thick squab, and I also built up the instrument panel & shroud. Gaps where the resin parts of the fuselage had been joined received a quick coat of Tippex as a filler. I am not altogether sure of the colour of the engine deck, but I don't believe it is the same as the fuselage, so I have gone for EDSG, which will eventually get a light metallic wash.
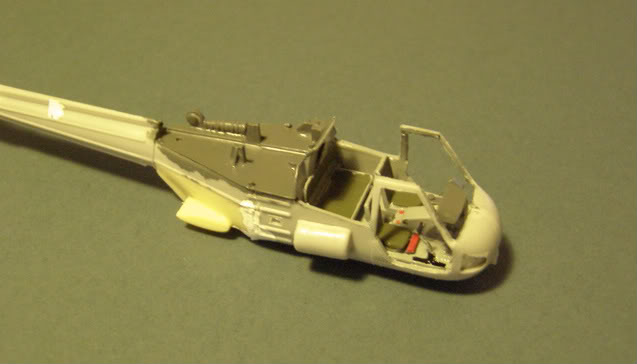
Quick update - cockpit almost complete. Now I need to work out how to attach the replacement canopy. Because of its complex shape it is really difficult to cut and trim.
Still a few dry fits here, but I couldn't resist a quick photo of progress. Managed to get the AS.11 sights superglued on without fogging the rest of the canopy!:
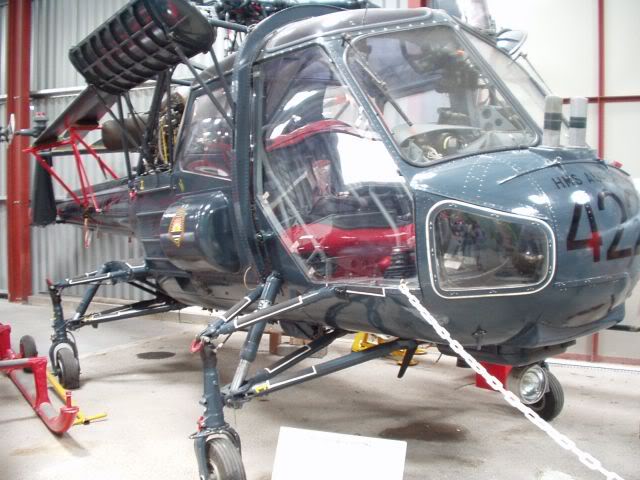
Quick reminder - this is what we are aiming at. This one sits in the superb Weston-Super-Mare Helicopter Museum.
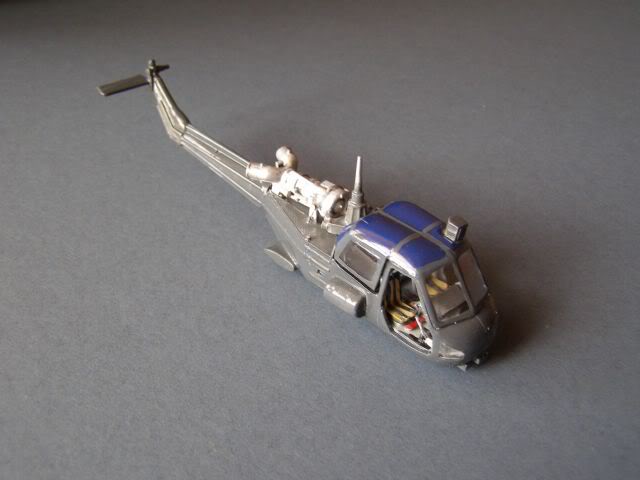
After an immensely frustrating evening, she is now really beginning to look like a Wasp. I also now remember why I hate photo-etch. Actually the PE wasn't the problem, it was more the white metal, which was quite crude. Aligning the undercarriage was a nightmare, that has taken all evening, and still one wheel doesnt touch the ground! One of the understruts actually snapped, and the whole thing looks more like it is in flight than sitting on the deck. I am hoping that when the glue has fully set it will be strong enough to bend a bit, into shape!!!!
Another quick update; building is now pretty much complete, with only the tail rotor to fit. I then need to tidy up some areas of detail before applying decals. Getting the main rotor to sit on its new shaft and mesh with the photo etch struts is proving difficult, but I do need to keep it removable for storage and transport purposes. Looks like this one is always going to be fragile though!

Decals on, only a little bit of tidying up to go!
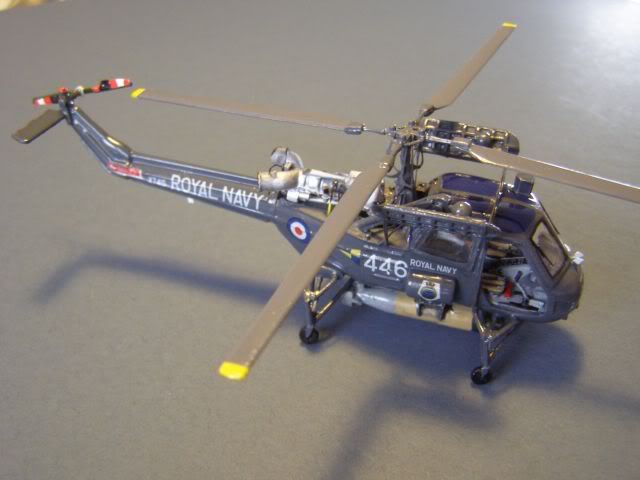
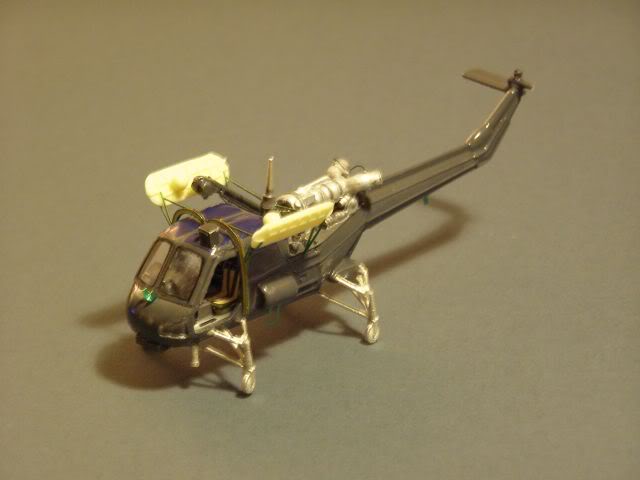
And finished; a very pleasing little project:
More details and pictures of the Wasp on the Helicopters pages
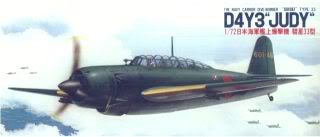
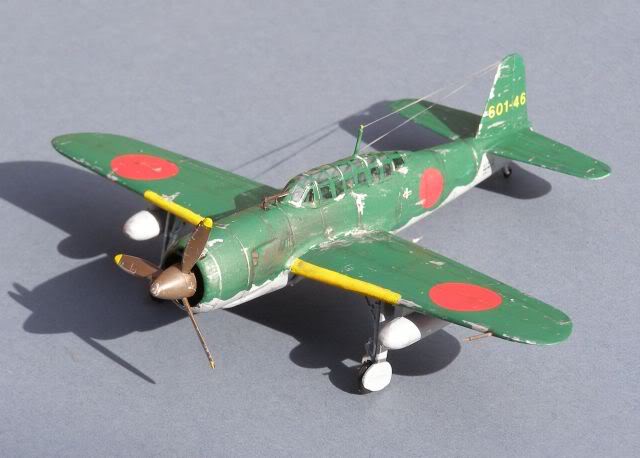
Yokosuka D4Y Suisei (Comet) "Judy" 601st Kokutai - Fujimi "OOB"
I feel the need for a break from nose-jobs, resin, etch etc, so for this month's second build I am doing something that I know next to nothing about ! For some reason, WW2 Japanese aircraft have always passed me by. The Zero on these pages was my first one in 40 yrs of modelling and that was only built a few years ago. The "Judy" fits well with my normal FAA modelling theme; several FAA aces earned their kills in combat with the Judy, and HMS ILLUSTRIOUS was hit and badly damaged by a kamikaze suicide Judy.
Fujimi kits have a mixed reputation ranging from truly superb to mediocre. Fortunately, this seems to be one of their better ones, with delicate engraved detail and beautifully engineered parts. Even better, it wasn't expensive (Frome Model Centre £5.99) !
However, as an AMS (advanced modeller syndrome) cure, it has its pitfalls, as the IJN modelling fraternity take themselves very seriously. The very first part of the build threw up the thorny question of Japanese aircraft interior colours. After considerable web research, I believe I have mixed up a reasonable interpretation of the correct shade of Aotake green/blue for a Yokosuka built aircraft!
I could, of course, be entirely wrong. Do I look bothered?
The kit itself went together without any drama; the only problem area was the rather fragile main gear. I didn't need any filler although I ran a light Tippex layer into the wing and tailplane joints "because I could". The cockpit gained some vanilla envelope(!) seatbelts, but otherwise it really is "out the box".
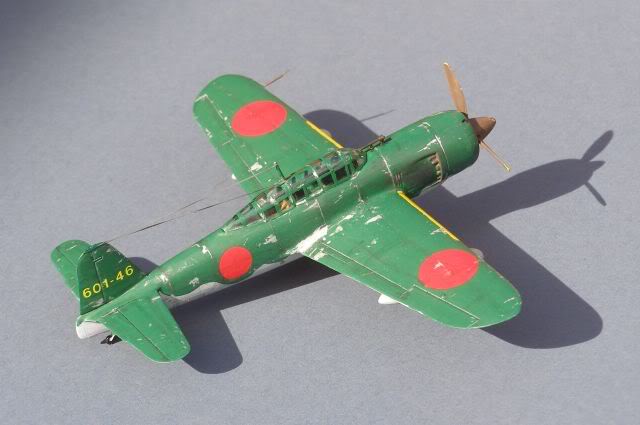
I overdid the weathering at first, and having been told off by eldest child (the Warhammer Weathering King), I toned the paint chipping down considerably; its still a bit too bright, but I am content with it. Decals were trouble free as well, and settled down nicely using decalfix.
More details and pictures of the Judy on the Adversaries pages
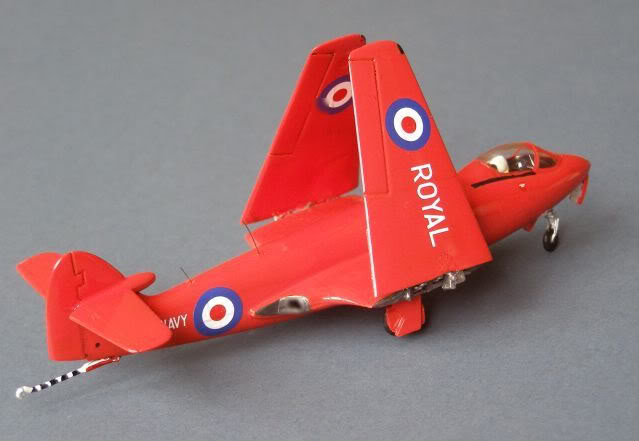
Hawker/Armstrong Whitworth Sea Hawk FB3, 738 NAS "The Red Devils", RNAS Lossiemouth, 1957 - Airfix, with own decals.
I have always thought that the Sea Hawk is one of the most elegant jets ever to fly. The Airfix kit was also one of the first models I ever built, so it holds a special place in my collection. It's a simple kit, first released in 1959, that has little detail, particularly around the cockpit and wheel wells - in other words a real "blast from the past". However, with a little work it does build up very nicely and can also be obtained very cheaply, making it the ideal base for a set of differently marked Sea Hawks from a period when FAA squadrons had a marvellous range of colourful badges painted on their aircraft!.
This one represents one of the 7 aircraft "Red Devils" display team who performed at the 1957 Farnborough show, specialising in synchronised simultaneous wing unfolding, formation take off and landing!
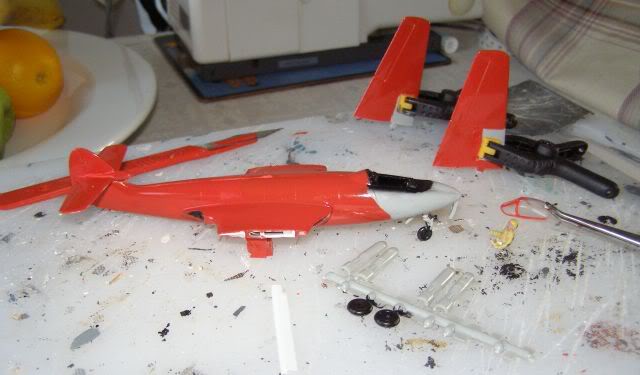
Panel lines were rescribed and a rough cockpit has been scratch built (mainly sprue side panels and a plastic card front panel). The wing fold mechanism is plastic card, based on my own photographs (I generally avoid folding wings, but it was a key part of the "Red Devils'" display routine, with the Royal Navy titles shown to the crowd).
Steady progress; as you can see in the background, a platoon of RMs preparing for Afghanistan has taken precedence!

Finished ! A simple, but attractive scheme:

More Sea Hawk pictures on the Sea Hawk Pages
www.gengriz.co.uk