February
2008
![]()
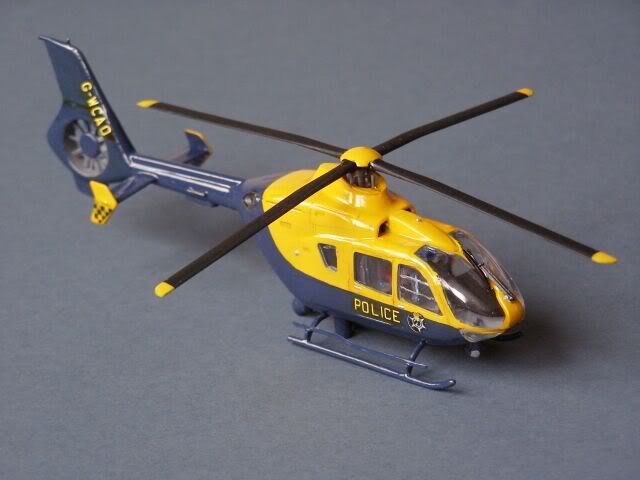
Eurocopter EC135. Western Counties Police Air Operations Unit, Filton Airfield, Bristol, 2008.
Started and largely built last month, this is the delicate and nicely detailed 1/72 Revell EC135VIP, modified into the local Western Counties Air Operations Unit Police Helicopter. Revell have produced a superb little kit of this "state of the art" helicopter (I suspect scaled down from their larger kit), although the fuselage sides are rather more slab like than they should be. The base kit I have used is the VIP transport version, but comes with internal parts to make an Air Ambulance as well. The EC135 is widely used by Police Forces across the world, and this particular one is a common sight over the skies of the Avon & Somerset and South Gloucestershire Policing areas. External additions are all sprue based.
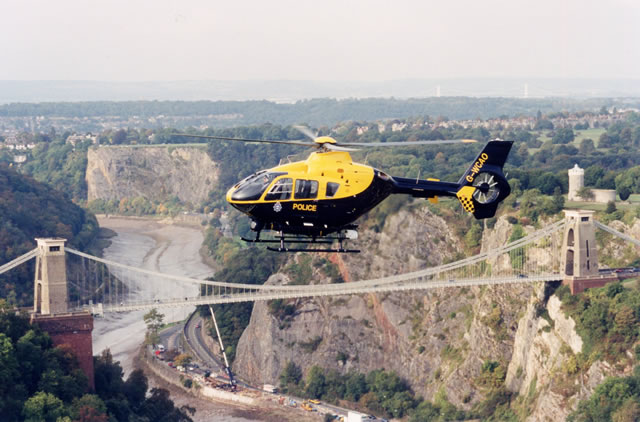
..... and here is a picture of the real thing, pinched from the WCAOU website:
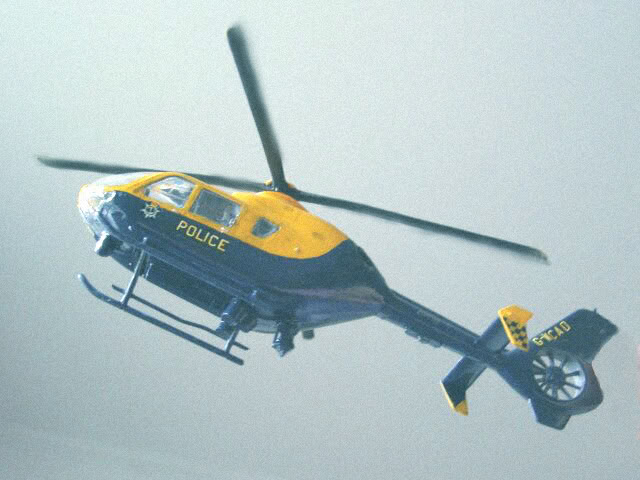
and just for a laugh, here is my model hovering in my bedroom !
More pictures and more helicopters on the Helicopters page
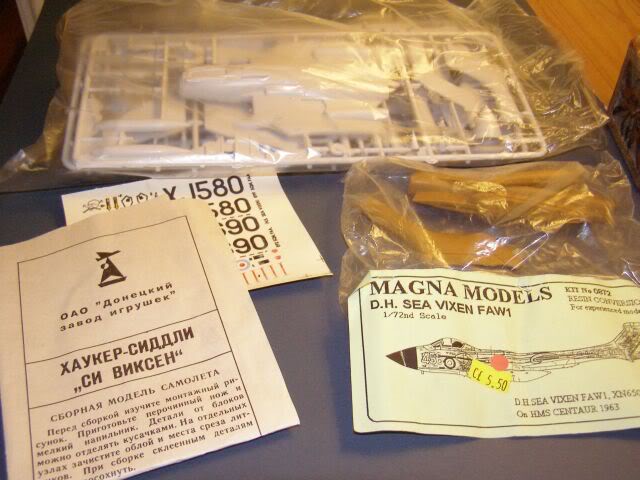
This is the rather chunky Frog kit, in this case a Russian re-pop bought from Hannants the year before last. I am aware that the kit has a number of issues, some of which I will try to correct. However, this particular moulding looks good, with a very small amount of flash on some sprues, but generally still quite crisp (a left over from a run for Revell perhaps?). Unlike most Novo kits, the transparencies are very clear and well moulded (I have the Falcon vacform replacement but dont see any need to use it) You certainly get plenty of plastic for your money.
The Magna resin is also quite chunky, providing new tail booms and inner wing sections without the saddle tanks. It has quite deep recessed lines, which will look odd beside the raised kit lines, so I will need to have a go at some rescribing (not one of my best developed skills).
Decals/transfers are coming from the Model Art set - haven't yet decided whether it will be 766 NAS (the "Fred's Five" display team sounds appropriate!), 890 NAS, or perhaps even 893 NAS.
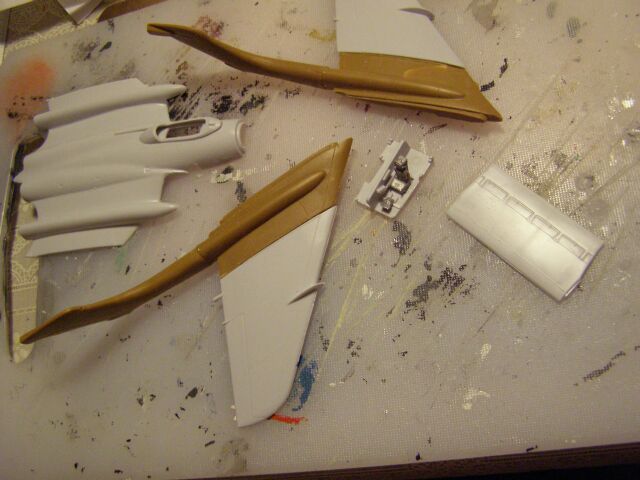
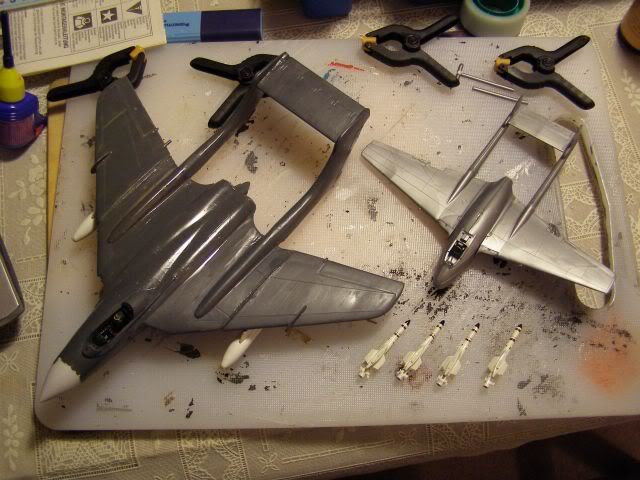
4 Feb 08 - Here's the raw materials; more piccies as we go along:
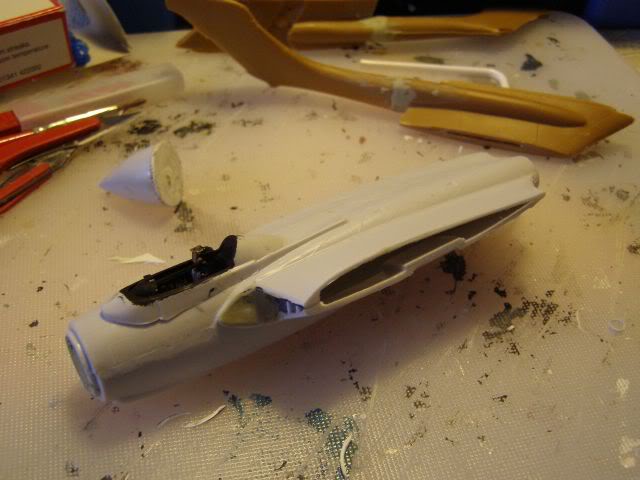
5 Feb - The Magna parts are indeed chunky, and needed a lot of cleaning up. Sadly they are also not quite the same diameters as the kit parts, which means a lot more sanding will be needed once they are in place, to blend them in. In any event, I have started by superglueing the wing roots and tail booms together. Meanwhile I have rescribed the wings, using the raised lines as a guide, and scratch built a basic cockpit interior (you cant see a lot once the canopy is on). I have also substituted the very simple kit ejector seat for a spare Aeroclub one. Its not the correct type, so I have hacked it about a bit to look more like the correct Martin Baker Mk4D.
12 Feb - Progress is fairly slow, what with model shows (see below), family outings etc. However, I am getting there. The scratch cockpit is now virtually complete and has been placed in-between the fuselage halves. I had a brief moment of panic when I thought the canopy might not fit over the replacement seat, but fortunately it does.
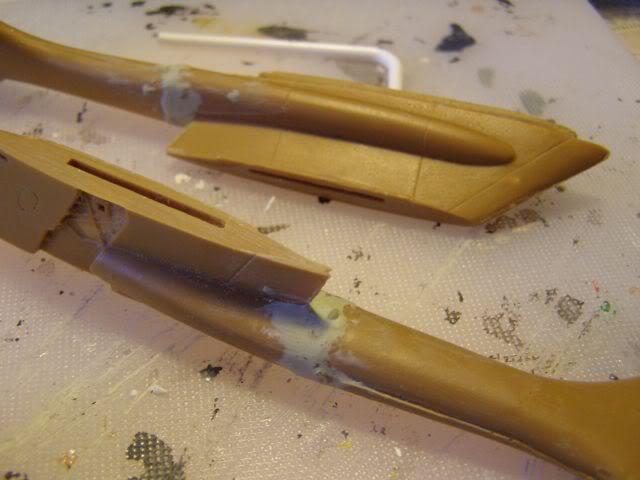
![]()
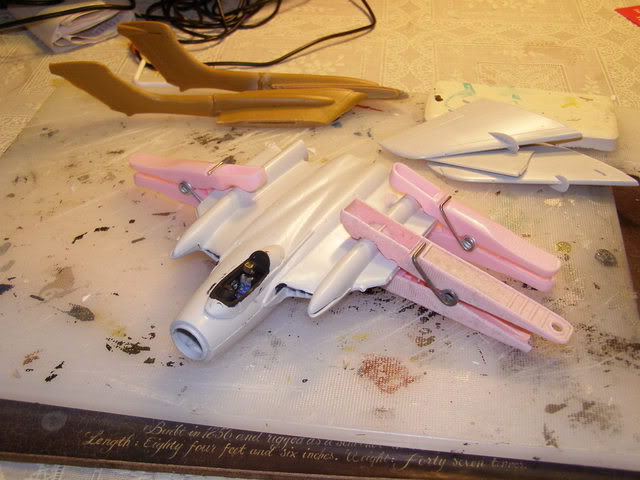
As you can see, the fit of the kit is even worse than the fit of the resin booms; my old Frog version of this kit may not have fitted well, but it was better than this! Both will need considerable filler to blend them in. Next up, separating the kit booms and inner wings from the fuselage. We will then see how well the resin replacements fit - my expectations are not high !
16 Feb - The fuselage has now been trimmed to fit the new wings, and I have begun to whittle, fill and sand down the worst fitting parts. Goodness knows what Frog were thinking when they engineered the intakes - they are crude and malformed almost by design! The kit's nose is also generally considered to be too fat; an effective solution I have seen elsewhere is to extend the nose by about 2-3mm, so I have begun to do so, by fitting a back plate on it that will sit on the existing lip and allow me to fill the gap with Milliput.
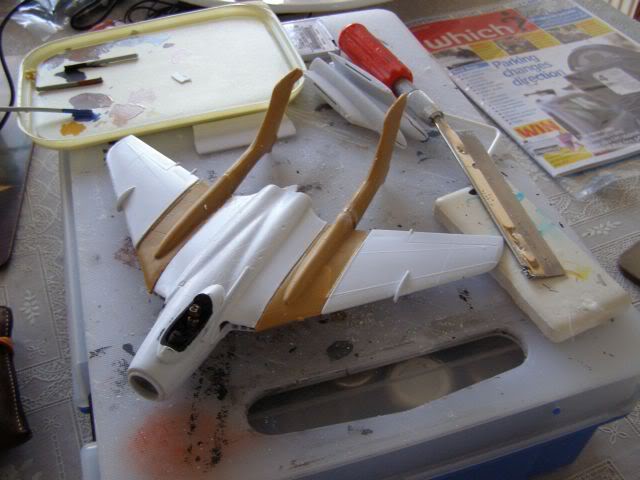
The kit is also infamous for its tail sitting propensity - those booms are very heavy after all, so both the fwd fuselage and the nose cone have been filled with lead. Indeed I may have overdone it; fortunately the nose wheel looks fairly sturdy.
The resin wing parts fit better than they look - more filler will be needed when I do the joins, but for now I intend to keep the model in pieces, for ease of handling, until the worst parts of the filling and sanding are complete.
The resin wing parts fit better than they look - more filler will be needed when I do the joins, but for now I intend to keep the model in pieces, for ease of handling, until the worst parts of the filling and sanding are complete.
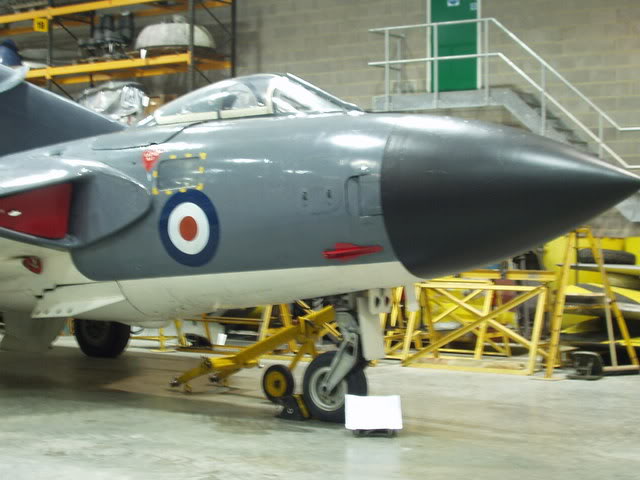
And just to remind me of the headmark - here is a real FAW1 at Yeovilton:
21 Feb - The tail boom joints blended in well with a little Milliput, and the nose extension also appears to have worked well. Whilst sanding the nose, I decided to reduce the size of the under nose rocket packs as they seemed to be a bit too rounded in comparison with my reference shots. Inner and outer wings are now attached with superglue and tomorrow I will sand down the putty to smooth out the joint between resin and plastic sections - she should then be ready for more paint.
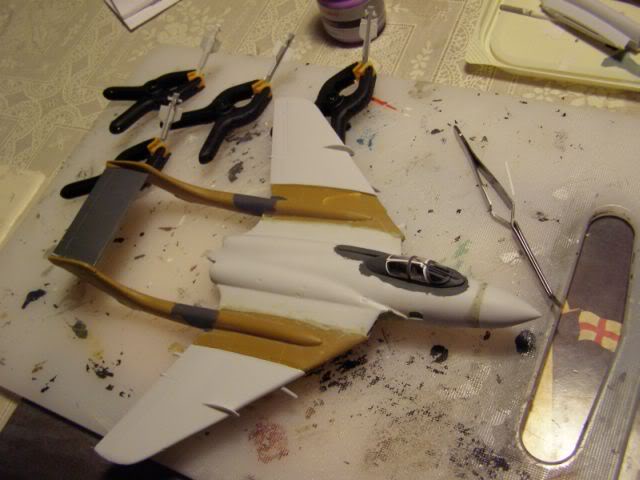
I have added the additional frames to the canopy (paper strips attached with Krystal Klear) and have been furiously scratch building Firestreak missiles from sprue, plastic strip and plastic card (from an old ice cream tub). Parts of the underside also have their first coat of white paint. Looking good so far!
23 Feb Well at least she is looking the right colour now (sort of). The paint has revealed a plethora of fit issues, most notable around the intakes and the folding joints. Waiting now for this paint to dry hard enough to do some puttying re-work. In the meantime, I am concentrating on the scratch built Firestreaks, which look surprisingly good considering their origins!
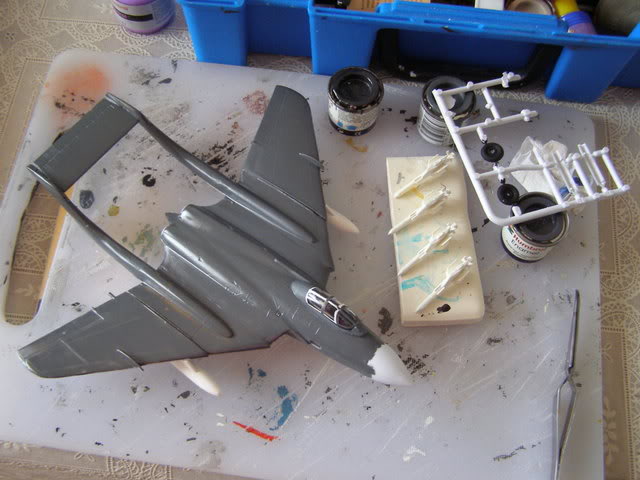
24 Feb - The intake rework is now complete; wing joints will take a little bit longer. I didn't rescribe the panel lines on the underside, so what I have done instead is gently sanded down the (thick) white paint until the raised lines show through it. This has given a more subtle panel line effect than Iwould have achieved with a wash and is quite pleasing.
Firestreaks are now finshed and awaiting the right moment for attachment, and I have successfully masked and painted the white/Grey demarkation lines on the nose and booms. Once I am happy with the wing joints I will try another top coat to see how it looks.
In the meantime, whilst waiting for the paint to dry, I have quickly rustled up a little friend - the Heller Vampire/Mistral, which will undergo a very simple conversion into a Sea Vampire F.20 !
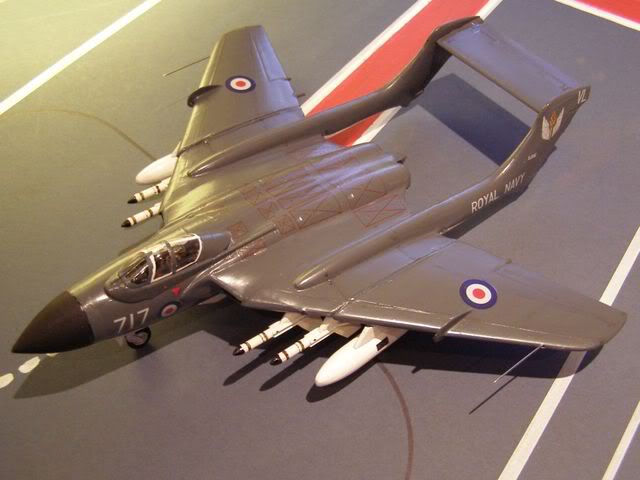
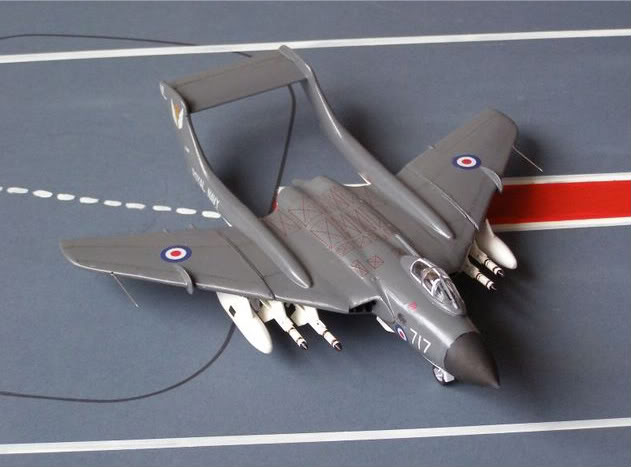
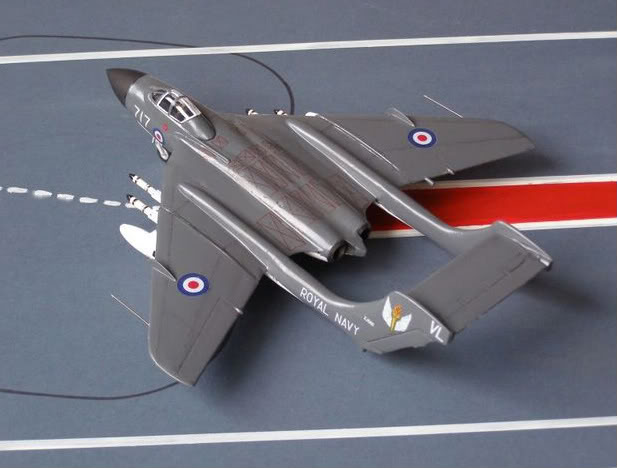
28 Feb - OK. Pretty much there now.
I have attached the various appendages, painted areas of detail and used a couple of dressmaker's pins for the twin pitot tubes. The EDSG paint received another light sanding with 400 grade Wet & Dry, followed by a light oily wash into the seams - during which serial it became obvious that the deeply engraved lines on the resin wing inserts are in entirely different places on each side. "D-i-s-a-p-p-o-i-n-t-i-n-g!", but since I had sanded them down quite considerably, not a huge problem now. The slots in the resin wings for the missile pylons were, as I suspected, the wrong size, so the pylon tabs were removed and butt-jointed to the wings with CA glue. The canopy had some rather large gaps, so I used Krystal Klear to fill them, followed by a paint touch-up.
I decided to go with the 766 Sqn markings - "Fred's Five" didnt actually wear this scheme, but it's "near enough for government work". I used original Frog markings for the national markings and serials, the Model Art set for the squadron markings and stencils, plus some Modeldecal white numbers for the "717" on the nose. All three types settled nicely under Humbrol Decalfix, although I did get a nasty white bloom on the upper fuselage red X markings. Fortunately it disappeared entirely under a coat of Humbrol Satin Cote.
I am also very glad that I put all of that lead into the nose, because it looks as though it was needed !
The photos below were taken in artificial light; I will try for some better ones at the weekend. However, I suspect that I may have overdone the oily wash on one wing - one of the perils of modelling at this time of the year; things can look perfectly fine until you see them in real daylight! If it is really that bad I may attempt to re-do it. Watch this space !!!

More pictures and another Sea Vixen on the RN Jets pages
Fleet Air Arm Museum Feb Show - Yeovilton, 9 Feb.
A most enjoyable and busy day - I understand that attendance broke all previous records and that some people had to wait for 90 mins to get in! We had a slightly smaller stand than before, just beneath Concorde, with Mrs T selling her "crafty things" beside me:
Our stand:
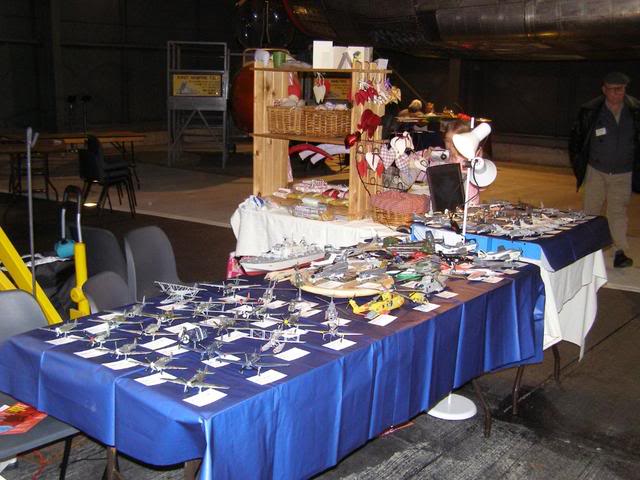
The view from our stand:
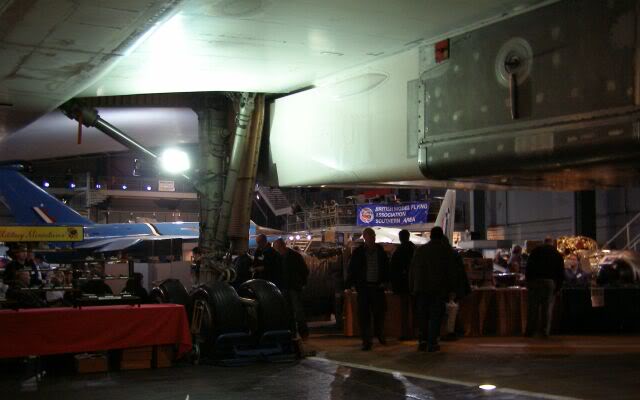
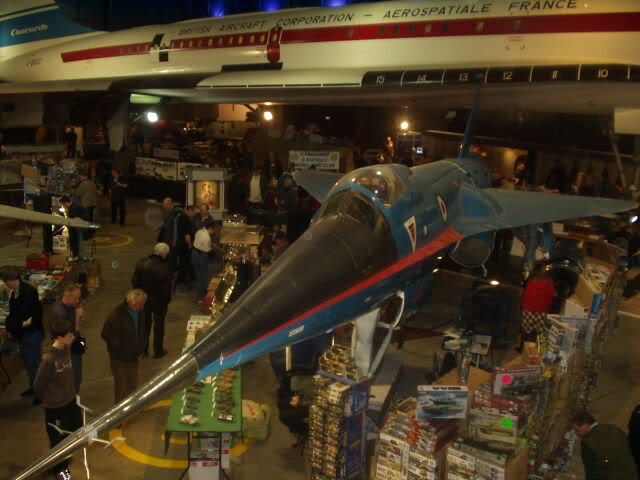
The Concorde Hall:
www.gengriz.co.uk